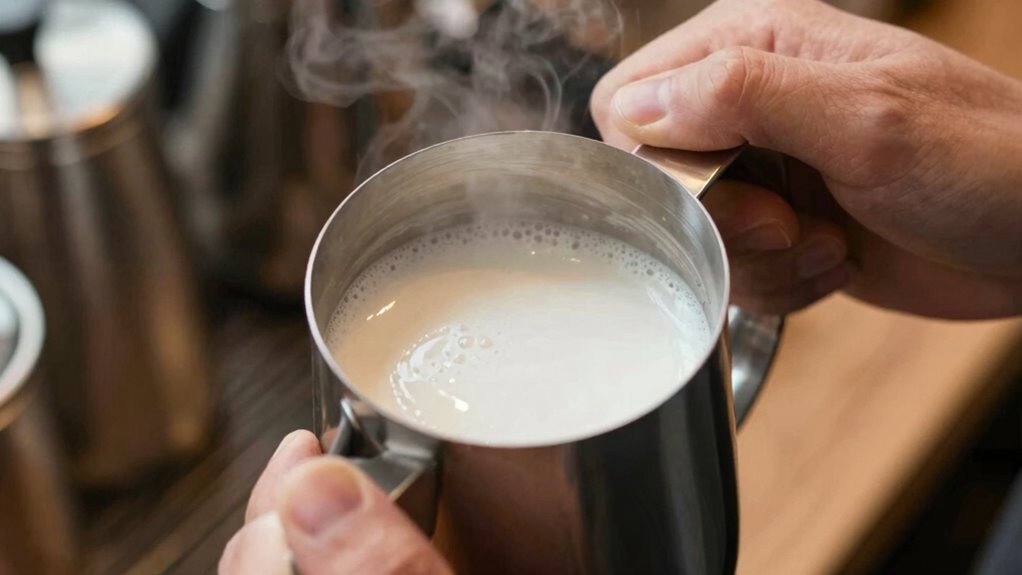

To get glossy microfoam, keep your milk between 140°F and 150°F. This temperature range helps proteins and fats work together, creating smooth, velvety foam with a shiny finish. Over 150°F, the foam can become dull and unstable, while below 140°F, it may be too weak and airy. Maintaining this perfect temperature is key, and if you continue, you’ll discover simple tips to master microfoam every time.
Key Takeaways
- The ideal frothing temperature range is approximately 140°F–150°F (60°C–65°C) for glossy, velvety microfoam.
- Maintaining milk temperature within this range preserves fats and proteins, ensuring stable, shiny foam.
- Overheating above 150°F can dull microfoam and cause protein breakdown, reducing glossiness and stability.
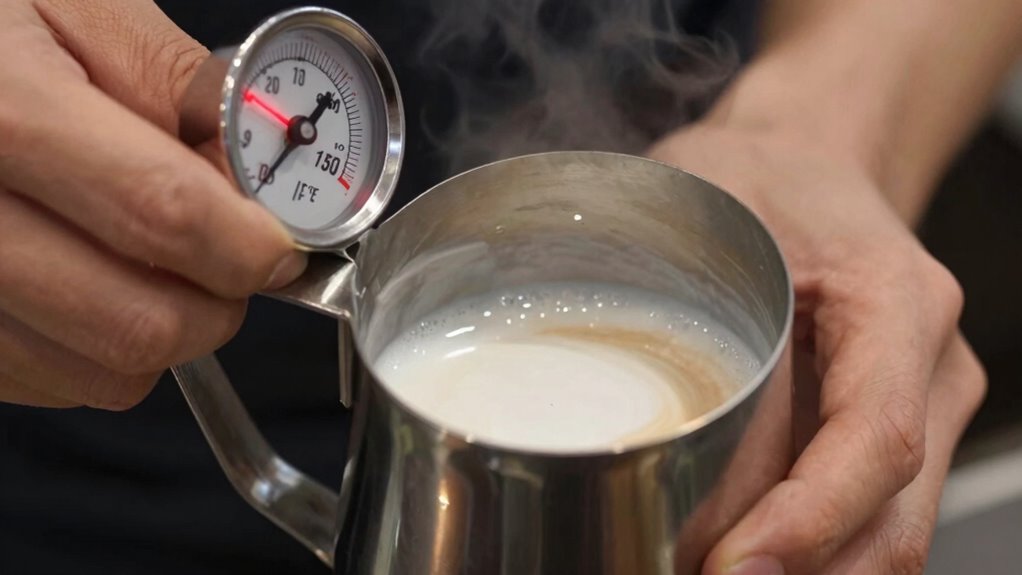
- Use a thermometer to monitor milk temperature precisely during frothing for optimal results.
- Proper technique—steady motion and just below the surface aeration—complements temperature control for perfect microfoam.
Why Milk Temperature Is Key to Perfect Microfoam
Achieving perfect microfoam depends heavily on the milk temperature because heat affects the milk’s texture and stability. When you heat milk, its protein structure, mainly milk protein, denatures at specific temperatures, helping create stable foam. The fat content also plays a role; higher fat levels can make the foam creamier and richer, but too much fat can hinder foam formation. Maintaining the right temperature guarantees these components work together, resulting in a smooth, glossy microfoam. If the milk is too cold, the proteins won’t denature enough, leading to weak foam. Conversely, overheating can cause the proteins to break down, making the foam thin and unstable. Understanding how milk protein and fat content respond to temperature is vital for achieving that perfect microfoam consistency. Additionally, energy-efficient heating methods can help maintain precise temperatures, ensuring consistent quality in microfoam creation. Proper temperature control also supports the sustainability of your coffee-making process by reducing energy waste. Implementing temperature regulation devices can further optimize the process and improve the overall microfoam quality. Using precise temperature measurements can help baristas fine-tune their steaming techniques for ideal microfoam every time. Recognizing the thermal properties of milk can also aid in selecting the best heating methods for consistent results.
What Is the Ideal Milk Frothing Temperature Range? (140°F–150°F)

The ideal milk frothing temperature range is between 140°F and 150°F because it optimizes the balance between protein denaturation and fat stability. At this temperature, the milk’s milk fat content helps create a smooth, glossy microfoam without breaking down the proteins responsible for foam stability. If the milk is fresh, it’s easier to reach this range without overheating, ensuring the fats remain intact and contribute to the desired texture. Temperatures above 150°F risk scorching the milk and losing freshness, which can lead to dull, less appealing microfoam. Conversely, lower temperatures may produce less stable foam and a less creamy mouthfeel. Staying within this range ensures your milk maintains its ideal microfoam texture, which is crucial for a perfect latte or cappuccino. Proper temperature control also preserves the freshness of the milk, which is crucial for achieving the best microfoam quality. Additionally, controlling the temperature within this range helps maintain the protein structure, essential for creating stable foam and a pleasing texture. Maintaining consistent temperature regulation during frothing helps prevent the formation of large bubbles and ensures a velvety consistency.
How Milk Composition Affects Frothing and Microfoam Glossiness

Milk composition plays an essential role in shaping the quality of froth and the glossiness of microfoam. Higher milk fat levels contribute to a richer, creamier texture, enhancing the microfoam’s shine and smoothness. Meanwhile, protein content directly impacts foam stability and glossiness; proteins help trap air and create a fine, velvety microfoam. Milk with balanced fat and protein levels produces microfoam that’s both glossy and long-lasting. Skim milk, with less fat and protein, tends to produce less glossy foam that’s more airy and less stable. Whole milk offers a good balance, creating microfoam that’s shiny and velvety. Understanding how milk composition influences frothing helps you select the right milk type to achieve that perfect, glossy microfoam. Additionally, milk temperature plays a crucial role in optimizing these properties, ensuring the microfoam achieves the ideal texture and sheen. Proper temperature control can also prevent issues like scalding or inadequate froth formation, which are common when milk is heated improperly. Maintaining consistent temperature control is essential for maximizing protein stability, which is vital for maintaining microfoam quality during steaming.
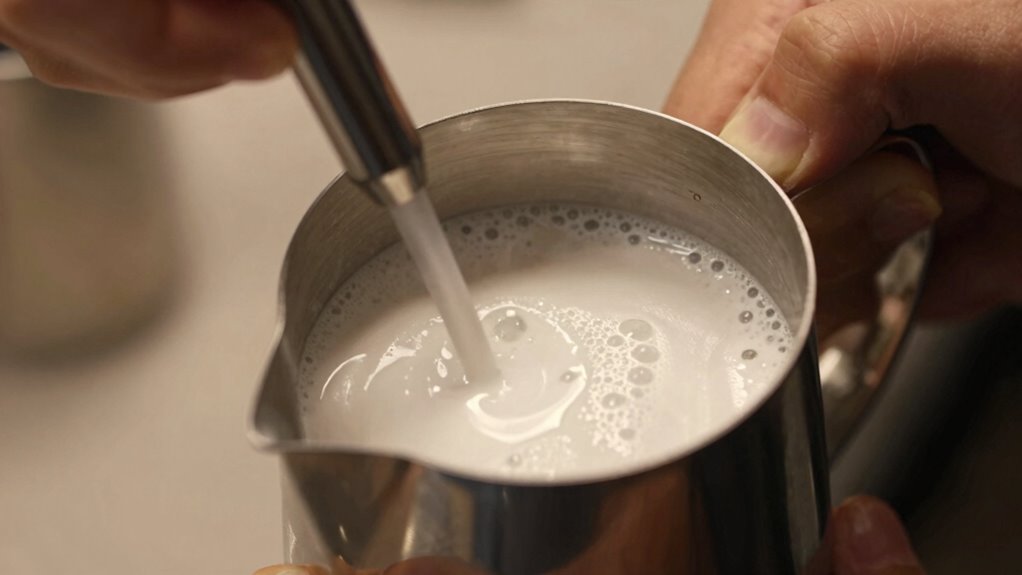
How to Measure and Achieve the Right Milk Temperature at Home
To guarantee your milk reaches the ideal temperature for frothing, you need to measure it accurately and monitor it closely as it heats. Start by choosing fresh milk, stored properly in the fridge, and pour it into a clean, stainless steel pitcher. Use a thermometer—preferably a digital one—to check the temperature frequently as you heat the milk on the stove or microwave. Aim for around 140°F (60°C) for perfect microfoam. Practice your frothing techniques to prevent overheating; stop steaming once you hit the target temperature. Consistently monitoring milk temperature helps prevent scorching and ensures glossy microfoam. Proper equipment placement, such as ensuring airflow around the unit, can help maintain consistent heating. Additionally, understanding proper heating techniques can make a significant difference in achieving optimal results. Maintaining the right milk temperature is essential for creating the perfect microfoam, and using the right tools can help you achieve more consistent results. Paying attention to temperature control methods can further enhance your frothing success. For example, being aware of heat distribution can help prevent hot spots that cause uneven heating. With careful measurement and attention, you’ll master achieving the right milk temperature at home for café-quality froth.
Common Mistakes That Ruin Microfoam Glossiness: and How to Avoid Them

Achieving glossy, velvety microfoam isn’t just about reaching the right temperature; it also depends on avoiding common mistakes that can compromise texture and appearance. One mistake is rushing milk steaming, which prevents proper foam stability and results in uneven, frothy milk rather than smooth microfoam. Overheating the milk can break down protein structures, leading to dull, less glossy foam. Using too much air during steaming creates large bubbles, ruining the velvety texture. Additionally, not cleaning your steaming equipment properly can introduce unwanted bacteria or residues that affect foam quality. Regularly maintaining your equipment can help prevent contamination and ensure optimal foam quality. Proper temperature control is essential for achieving a consistent, glossy microfoam, as it helps preserve the milk’s proteins and fats. This way, you’ll maintain foam stability and achieve that perfect glossy finish, especially when you pay attention to steam wand technique for better aeration and texture. Remember that milk quality also plays a crucial role in the final appearance and flavor of your microfoam.
Tips for Frothing Milk Consistently With Simple Tools
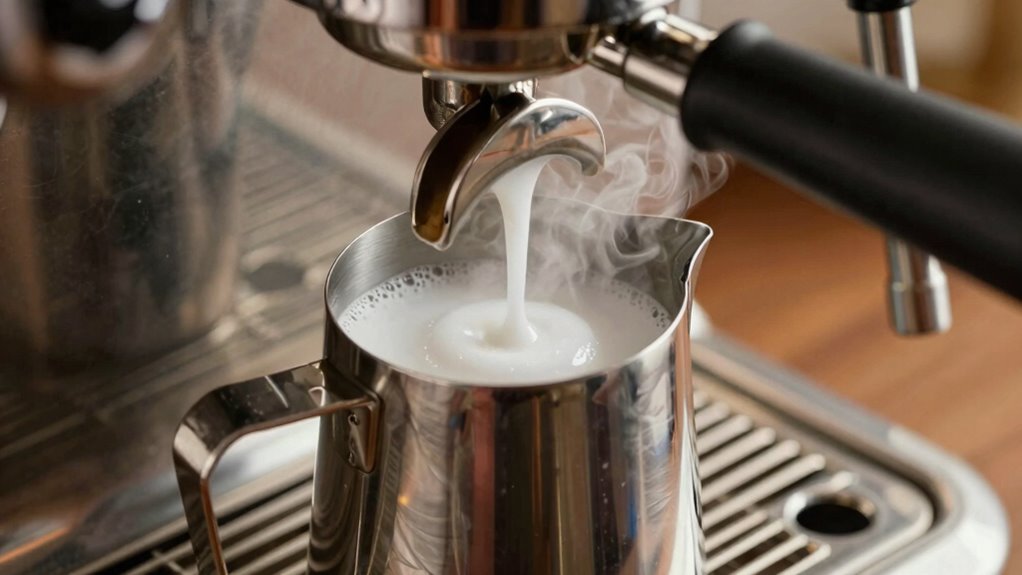
Frothing milk consistently doesn’t require fancy equipment; with just a few simple tools and techniques, you can achieve excellent microfoam every time. Focus on the milk frothing basics: use fresh, cold milk and a steady hand. Maintain a consistent angle and position for your frothing wand to ensure even aeration. Mastering latte art techniques starts with a smooth, glossy microfoam, so practice your pouring skills once you get the hang of frothing.
| Tool | Technique | Tip |
|---|---|---|
| Milk pitcher | Proper positioning | Keep the tip just below the surface |
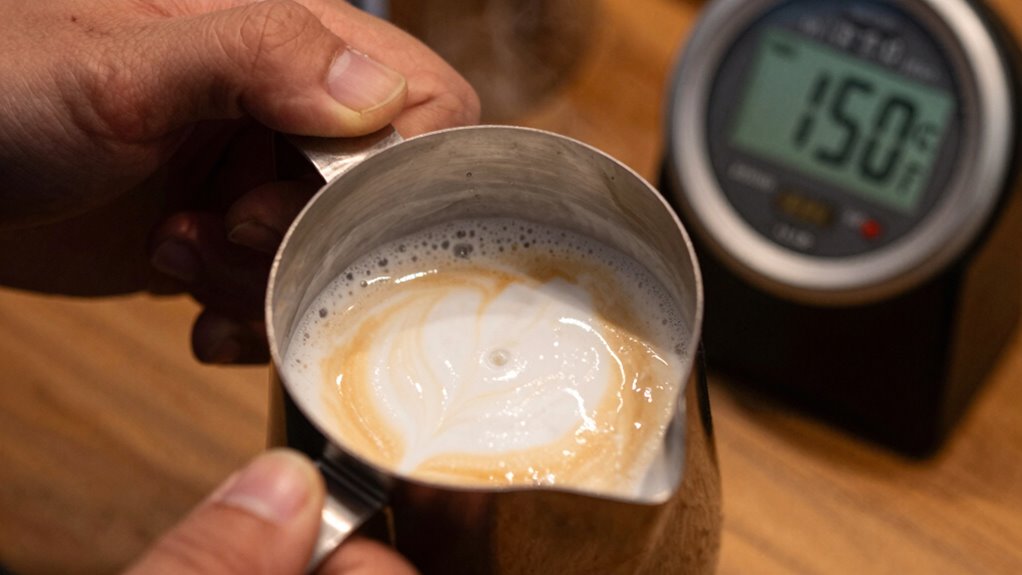
| Thermometer | Temperature control | Froth at around 150°F for best results |
| Frothing wand | Consistent motion | Create a whirlpool for uniform foam |
Troubleshooting Microfoam: Why Your Milk Isn’t Glossy and How to Fix It
If your milk isn’t developing that smooth, glossy microfoam you’re aiming for, it’s often a sign that something’s off in your technique or setup. One common issue is milk fat content; milk with too little fat won’t create a rich, shiny microfoam, while too much can hinder proper frothing. Also, improper temperature control can cause protein denaturation, leading to dull, stringy foam instead of silky microfoam. To fix this, ensure your milk is fresh and at the right temperature—around 140°F (60°C)—to preserve ideal milk fat structure and prevent over-heating that damages proteins. Use a steady, consistent motion while frothing, and avoid overheating the milk. Proper technique and attention to temperature are key to achieving that glossy, velvety microfoam.
Frequently Asked Questions
Can Different Types of Milk Require Different Ideal Frothing Temperatures?
Yes, different types of milk require different ideal frothing temperatures because milk composition varies. For example, whole milk needs a slightly higher temperature to develop rich, glossy microfoam, while skim milk froths best at a lower temp to avoid overheating and losing foam quality. Adjust your frothing techniques accordingly, paying attention to the milk’s texture and temperature, to achieve perfect microfoam every time.
How Does Altitude Affect Milk Frothing Temperature and Microfoam Quality?
Altitude effects can influence your milk frothing consistency because higher elevations have lower boiling points and air pressure. You might find it harder to reach the ideal temperature, which can impact microfoam quality. To maintain that perfect, glossy microfoam, you may need to adjust your frothing techniques or slightly modify your temperature target. Experimenting at your specific altitude helps you achieve consistent frothing results and ideal microfoam.
Is There a Temperature Difference for Frothing Dairy Versus Plant-Based Milks?
You might notice a difference when frothing dairy versus plant-based milks—temperature variations matter. Dairy usually reaches its ideal microfoam temperature around 150-155°F, creating that glossy texture you crave. Plant-based options, however, often require slightly lower temperatures to prevent scorching or curdling, typically around 140-150°F. Keep an eye on these subtle variations; mastering them reveals that perfect, velvety microfoam every time.
What Role Does Steam Pressure Play in Achieving Glossy Microfoam?
Steam pressure directly impacts foam stability and glossiness in your microfoam. When you apply ideal steam pressure, it creates the right amount of force to incorporate air smoothly, producing stable, glossy microfoam. Too much pressure can cause large bubbles and uneven texture, while too little results in thin, unstable foam. By maintaining consistent steam pressure, you guarantee your milk froth stays glossy, stable, and perfect for your latte art.
How Does Reheating Milk Impact Its Frothing Temperature and Microfoam Glossiness?
Imagine reheating milk like reigniting a flame—if you overdo it, the microfoam glossiness dims, and the temperature climbs past the ideal point. Reheating milk can cause uneven heating, disrupting the delicate balance needed for glossy microfoam. It risks breaking down the proteins, resulting in duller foam and less smooth texture. To keep microfoam glossiness, heat milk gently and avoid reheating, preserving that silky, glossy finish.
Conclusion
Mastering the perfect milk temperature is your key to glossy microfoam that impresses every time. But even if you think you’ve nailed it, subtle tweaks can make all the difference. Will your next frothing session bring that perfect shine, or will a small mistake hold you back? Keep experimenting, stay attentive, and you’ll uncover the secret to consistently flawless microfoam. The perfect cup is closer than you think—are you ready to find out?