
If your blender leaks from the bottom, it’s likely due to a faulty or misaligned seal. First, unplug it and check the rubber or silicone gasket for cracks, tears, or debris. Make sure it sits securely and evenly in its groove. Cleaning and reseating the seal can often fix the issue, but if damage persists, replacing the seal or inspecting for other damage may be necessary. Keep exploring for more tips to fix your blender effectively.
Key Takeaways
- Unplug the blender and inspect the rubber gasket for tears, misalignment, debris, or residue buildup.
- Ensure the seal sits evenly, securely, and is free from cracks, deformation, or hardening.
- Clean the sealing area regularly to prevent residue buildup that can cause leaks.
- Check for visible damage or misalignment around the seal, replacing it if leaks persist.
- Confirm the jar and lid are properly assembled and tightened without over-tightening to prevent seal failure.

Blender Gasket Replacement Parts, Rubber Ring Seal Rings Blender Accessories for Oster and Osterizer Blender (4 Pieces)
【Compatible】:These blender replacement parts are compatible with Oster and Osterizer Blender. But not for Oster Pro 1200, In2uitive…
As an affiliate, we earn on qualifying purchases.
As an affiliate, we earn on qualifying purchases.
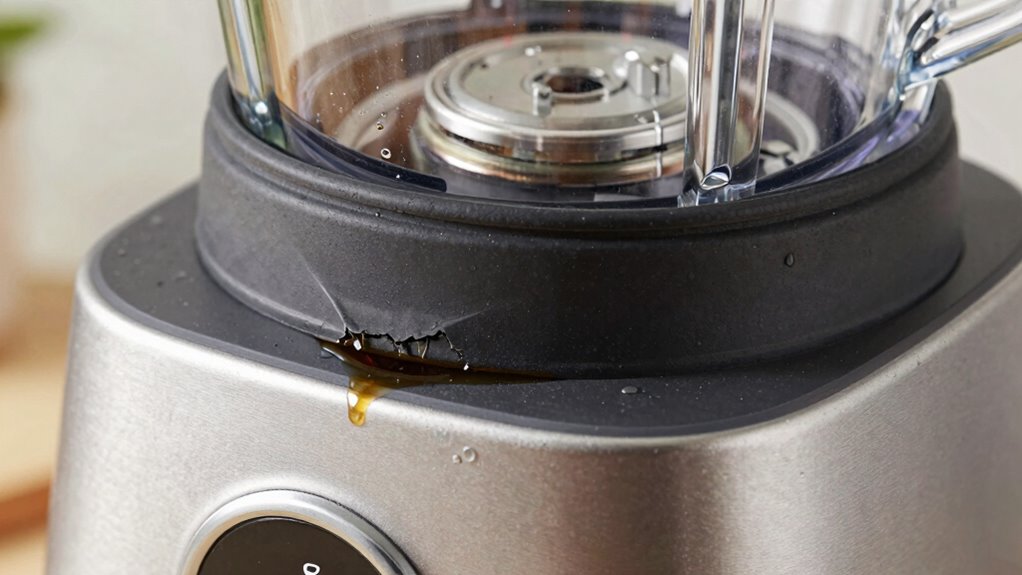
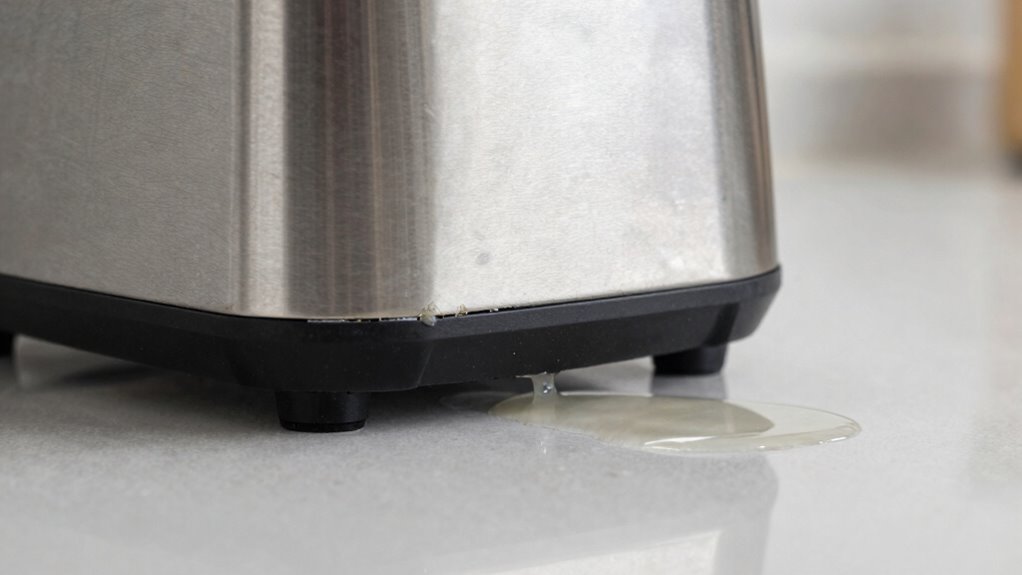
How to Check If Your Blender Is Leaking From the Bottom
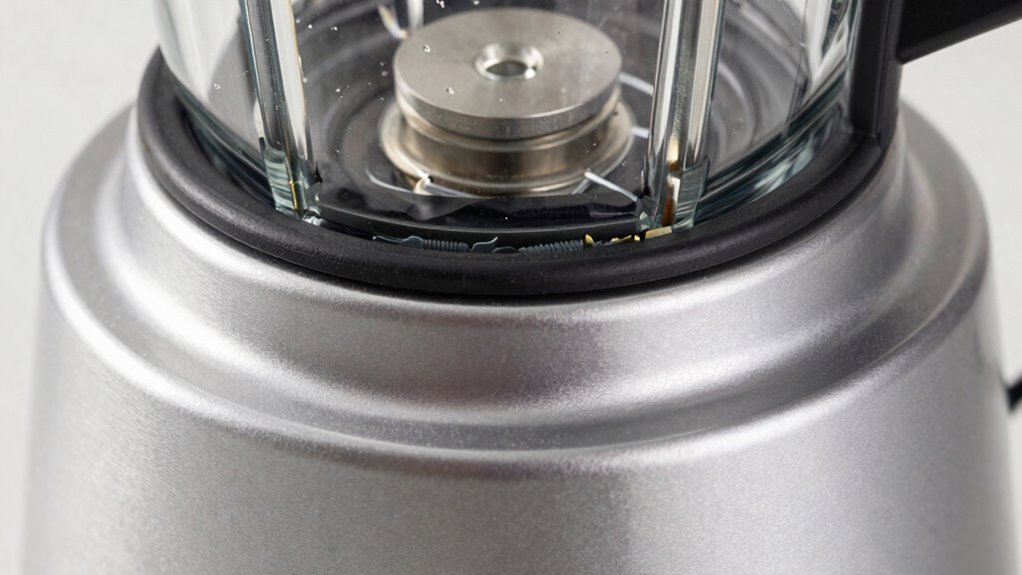
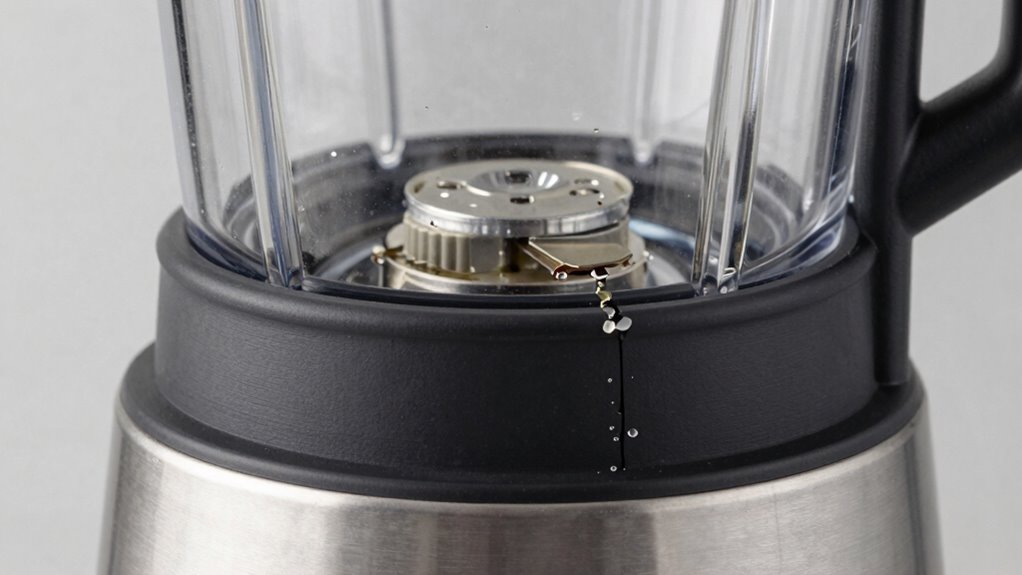
To determine if your blender is leaking from the bottom, start by unplugging it and inspecting the base carefully. Look for any cracks, gaps, or signs of moisture around the seal area. Perform a thorough seal inspection by checking if the rubber or silicone gasket is intact and seated properly. A damaged or misaligned seal can lead to leaks, so ensure it’s snug and free of debris. While examining the seal, also look for buildup or sticky residue, which could indicate a past leak. Proper leak prevention starts with a solid seal, so replacing worn or damaged gaskets is essential. Additionally, understanding the contrast ratio of your blender’s components can help identify issues related to image and performance, which parallels ensuring proper sealing for optimal operation. Regularly cleaning the gasket area can prevent residue buildup that might compromise the seal over time. Incorporating routine seal checks into your maintenance can help catch issues early and avoid unexpected leaks. Recognizing the importance of proper sealing can save you time and money by preventing more serious damage. For example, many common blender issues stem from inadequate seals or improper assembly, so paying attention to these details is crucial. If everything appears intact but leaks persist, further investigation may be necessary. Regular seal inspection helps prevent leaks and extends your blender’s lifespan.

3pcs Blender Replacement Parts Seal Kit, Includes Rubber Sealing Plugs O-Ring and Gaskets Compatible with Ninja BC151 Series Durable Blender Lid Accessories
Product Contents: The 3-piece replacement set comes with 1 gasket, 1 sealing o-ring, and 1 sealing plug, offering…
As an affiliate, we earn on qualifying purchases.
As an affiliate, we earn on qualifying purchases.
Why Is My Blender Leaking? Common Causes Explained
When your blender starts leaking from the bottom, it’s often due to a few common issues. Battery issues can cause internal damage or pressure buildup, leading to leaks. Motor overheating may weaken seals or components, resulting in liquid escaping. Additionally, a cracked or damaged base housing can allow leaks to develop. Finally, overloading the blender or using it for extended periods can strain internal parts, increasing the chance of leaks. Keep an eye on signs like excessive heat or strange noises, which indicate problems like motor overheating. Regularly inspecting your blender for cracks, ensuring proper loading, and avoiding prolonged use can prevent these issues. Proper seal integrity is also essential, as compromised seals can significantly contribute to leaks. Ensuring your blender has a good maintenance routine can help detect early signs of seal wear or damage. Additionally, checking the internal components periodically can help identify potential failure points before leaks occur. Maintaining proper ventilation and cooling can also help prevent overheating-related damage and leaks. Performing preventive inspections regularly can catch small issues before they lead to leaks.

3 Pcs Blender Gasket for Oster and Osterizer Blender O-Ring Rubber Ring Seal Rings Replacement Parts Accessories
Perfect Compatibility with Oster Blenders:Designed specifically for Oster blenders, this gasket fits most standard and wide-mouth jar models….
As an affiliate, we earn on qualifying purchases.
As an affiliate, we earn on qualifying purchases.
How to Tell If the Seal Is Loose or Worn Out
Check for visible damage on the seal, like cracks or tears, which can indicate it’s worn out. If your blender leaks while in use or you find it hard to secure the lid tightly, the seal might be loose or damaged. Paying attention to these signs helps you identify if the seal needs replacing before more leaks occur. Additionally, inspecting the filter indicators on your appliance can alert you to potential issues that affect overall performance. Regularly monitoring the seal integrity can prevent leaks and extend the lifespan of your blender. Ensuring the connected equipment is functioning correctly can also help detect issues early and maintain optimal performance. Recognizing signs of wear and tear on the seal can save you time and prevent costly repairs. Being familiar with the proper maintenance routines for your blender can also contribute to preventing leaks and prolonging its effective use.
Visible Seal Damage
Visible seal damage is often the first sign your blender’s bottom leak might be caused by a worn or loose seal. Look closely at the seal for any telltale signs of deterioration.
- Visible cracks or splits in the seal indicate it’s compromised.
- Discoloration or hardening can suggest the seal has become brittle over time.
- Deformation or warping means the seal no longer fits snugly.
- Any debris or residue stuck around the seal area could be a sign of damage or deterioration.
- Regular inspection for seal integrity can help you catch issues early before they lead to more significant leaks.
- Checking for wear and tear during routine maintenance can prolong the life of your blender’s seal and prevent leaks.
- Incorporating preventive maintenance routines can further help in extending the lifespan of your seals and avoid unexpected failures.
- Being attentive to early warning signs can significantly reduce the likelihood of a leak developing over time.
- Understanding seal material compatibility can also aid in selecting the right replacement parts and avoid unnecessary damage.
These signs show that your seal might be loose or worn out, making it less effective at preventing leaks. Regularly inspecting for visible cracks or damage can help you catch issues early before they lead to more significant leaks.
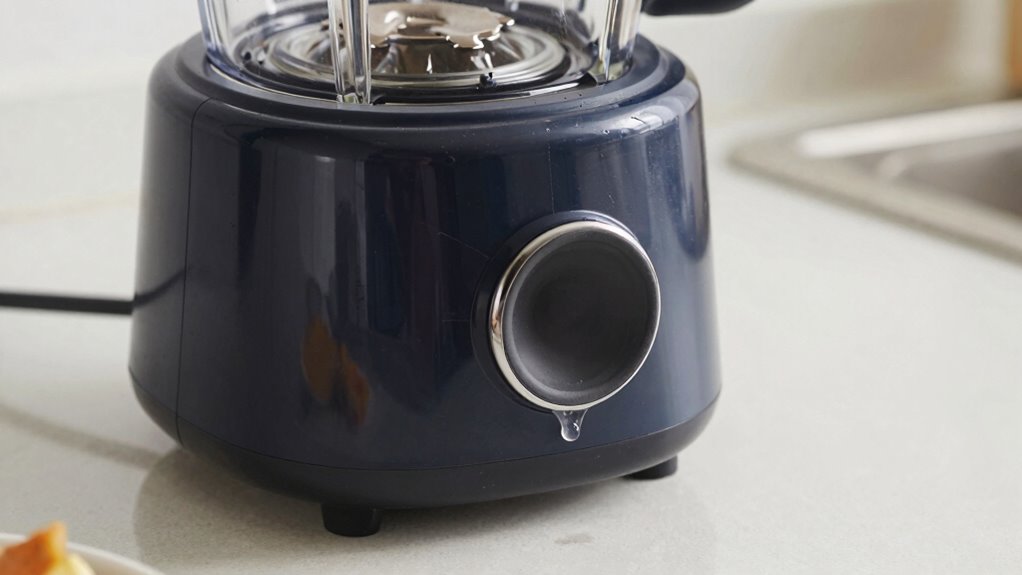
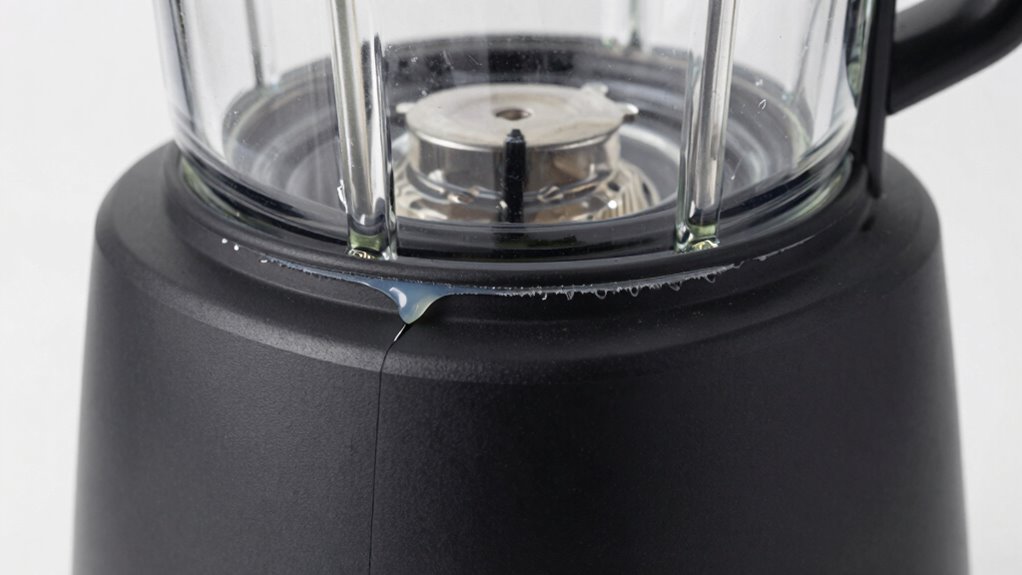
Leaking During Use
If your blender starts leaking while you’re blending, it’s likely a sign that the seal has become loose or worn out. The blender design relies on a tight seal to contain liquids and ingredients during operation, so any deterioration can cause leaks. When the seal isn’t secure, you might notice a dripping sound or see liquid escaping from the bottom or sides of the appliance. This not only disrupts your blending process but can also pose safety hazards, especially if hot liquids or sharp blades are involved. To protect your user safety and guarantee ideal performance, check the seal regularly for signs of wear or looseness. Replacing a worn seal promptly helps prevent leaks, maintains blender efficiency, and keeps you safe during use. Regular inspections of kitchen tools can help catch issues early before they lead to bigger problems. Additionally, understanding how blender seals function can assist you in diagnosing and preventing leaks more effectively.
Difficulty Securing Lid
A loose or worn-out lid seal often makes it difficult to securely fasten the blender lid, leading to potential leaks during operation. If you notice the lid feels loose or won’t stay in place, the seal may be compromised. This affects lid security and can cause ingredients to splash or leak, especially when blending at high speeds. A faulty seal can also cause motor overheating, as the blender struggles to maintain proper operation. To check the seal:
- Inspect for cracks or tears in the rubber gasket
- Ensure the seal sits snugly without gaps
- Replace the seal if it’s deformed or brittle
- Confirm the lid clicks securely into place
- Regularly body jewelry measurements ensure proper fit and seal integrity
Addressing these issues ensures lid security, prevents leaks, and helps avoid motor overheating.

2pcs Blender Gasket for Oster, Rubber Gray O-Ring Blender Gasket Replacement Blender Ring Replacement Good Sealing Blender Parts Compatible with Oster Osterizer
Product Content: You will receive 2 pieces of blender gaskets, which are compatible with Oster and Osterizer. They…
As an affiliate, we earn on qualifying purchases.
As an affiliate, we earn on qualifying purchases.
How to Replace or Tighten Your Blender’s Seal Correctly
Start by carefully inspecting the seal for any damage or wear to guarantee it needs replacement or tightening. Next, reassemble the blender, making sure the seal is seated correctly and securely in place. Finally, test your blender to confirm the leak is fixed and that everything operates smoothly.
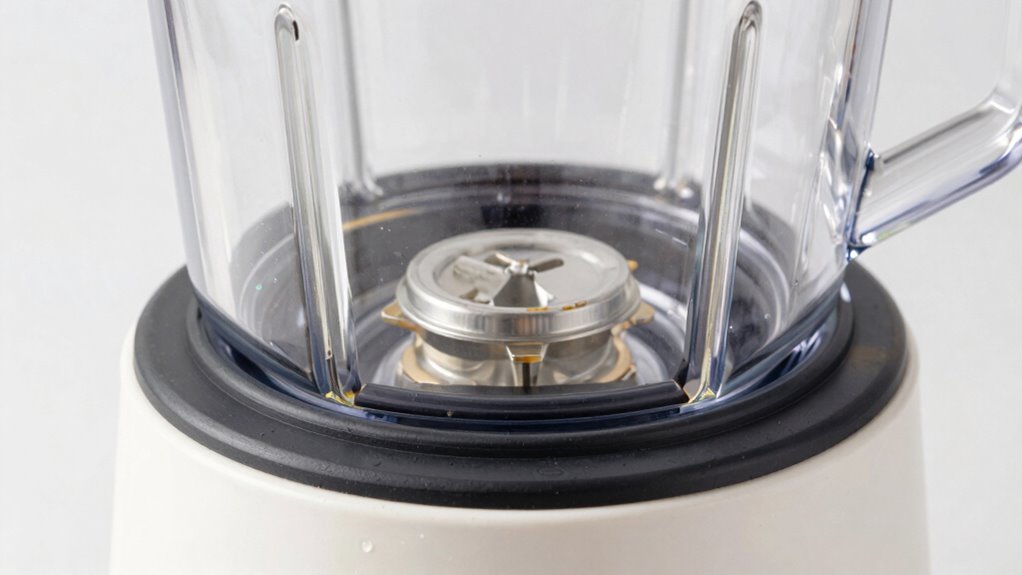
Inspect the Seal Properly
To guarantee your blender stops leaking from the bottom, it’s essential to inspect the seal thoroughly. Proper seal inspection helps identify cracks, debris, or misalignments that can cause leaks. Start by removing the blender jar and examining the seal for any visible damage or residue that could hinder a proper fit. Check if the seal is sitting evenly and securely in its groove. Make sure there are no cracks or tears, as these weaken leak prevention. Also, clean around the seal to remove any stuck debris that might cause misalignment. Take your time to ensure the seal is clean, intact, and properly seated. This careful inspection is key to effective leak prevention and restoring your blender’s performance.
- Look for visible cracks or tears
- Remove any stuck debris or residue
- Ensure the seal is seated evenly
- Confirm the seal is clean and undamaged
Reassemble and Test Securely
Once you’ve inspected the seal and confirmed it’s clean and undamaged, carefully reassemble the blender by positioning the seal firmly in its groove. Proper seal maintenance is vital to prevent leaks and ensure your blender functions correctly. As you put the parts back together, double-check that the seal is seated evenly and securely. Tighten the lid and any other components according to your manufacturer’s instructions, but avoid overtightening, which could damage the seal. Testing the assembly with a small amount of liquid helps verify the fix without risking user safety or causing a mess. Always prioritize user safety by unplugging the blender during reassembly and testing. Following these steps ensures the seal is secure and your blender operates leak-free.
When to Replace the Seal or Call a Technician
If you notice persistent leaks from the bottom of your blender despite cleaning and tightening the lid, it’s likely time to substitute the seal or call a technician. Seal replacement is straightforward if the seal shows signs of wear, cracking, or damage. However, if you’re unsure about the issue or uncomfortable performing repair yourself, professional repair is a wise choice. Consider these signs:
- The seal appears cracked or deformed
- Leaks continue despite reassembly
- You notice mold or debris buildup around the seal
- Your blender is old and the seal hasn’t been replaced before
Deciding between seal replacement and professional repair depends on your comfort level and the seal’s condition. When in doubt, consulting a technician can prevent further damage and ensure safety.
Tips to Prevent Future Blender Leaks
Preventing future blender leaks starts with regular maintenance and proper usage. Begin by routinely inspecting the seal for signs of wear or damage, as a compromised seal is a common leak source. During seal inspection, ensure it’s seated correctly and free of debris or cracks. Always tighten the jar securely before blending, but avoid over-tightening, which can damage the seal or threads. Use your blender on appropriate settings, avoiding excessive force or blending hard ingredients for extended periods. Clean the gasket and sealing area after each use to prevent buildup that could compromise leak prevention. By consistently checking the seal and maintaining your blender properly, you reduce the risk of leaks and extend the appliance’s lifespan. Proper care is key to leak-free blending.
Other Reasons Your Blender Might Leak (Beyond the Seal)
While a worn or damaged seal is a common cause of leaks, other factors can also contribute to your blender spilling liquids. Poor blender maintenance or improper assembly might cause leaks even if the seal looks fine. For example, overfilled containers can put pressure on the lid or gasket, leading to leaks. Cracks or warping in the jar or base can also be culprits, especially if the blender has been dropped or mishandled. Additionally, worn threads on the lid or base might prevent a tight seal. Regularly inspecting your blender and ensuring proper assembly is essential for leak prevention. These steps help you identify issues beyond the seal, keeping your appliance functioning smoothly and avoiding messes.
Troubleshooting Your Blender Leak Step-by-Step
To effectively troubleshoot a leaking blender, start by carefully inspecting the jar, lid, and base for visible damage or misalignment. Perform a thorough seal inspection around the jar’s rim and the lid to identify any cracks, warping, or loose fittings that could cause leaks. During leak detection, fill the jar with water and run the blender briefly to observe where the liquid escapes. Check if the seal is properly seated and intact; a worn or damaged seal is a common source of leaks. Also, examine the base for cracks or loose parts. By methodically inspecting each component, you can pinpoint the leak’s origin and determine whether you need to replace the seal or repair other damaged parts.
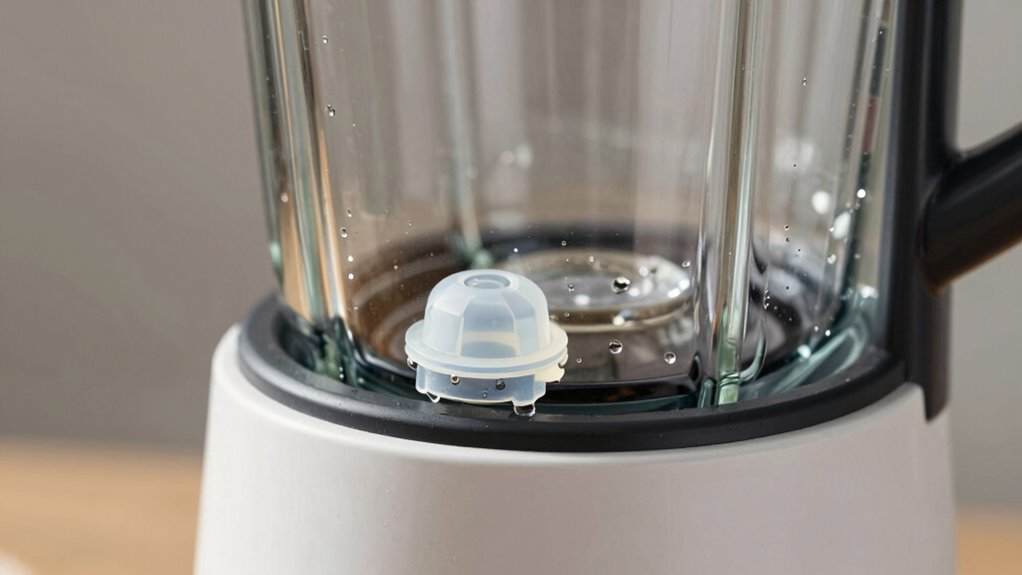
Quick Fix: How to Perform a Seal Check in a Few Minutes
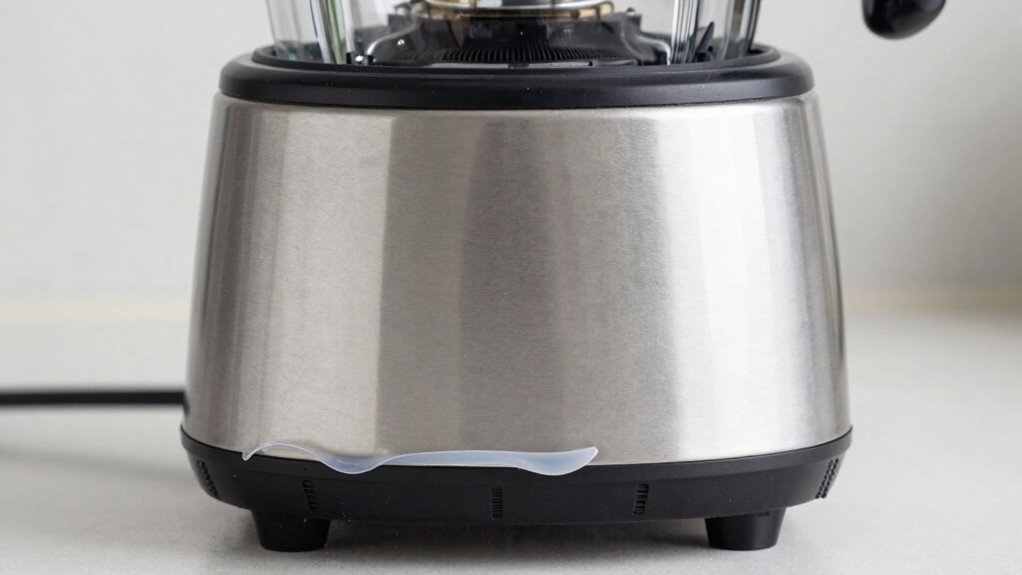
Performing a quick seal check is a straightforward way to identify if the gasket or seal is causing your blender to leak. This simple step helps you determine whether sealing techniques or appliance maintenance can fix the issue. First, unplug your blender and disassemble the jar from the base. Then, examine the gasket for cracks, tears, or debris. Next, fill the jar with water and secure the lid tightly. Turn the blender upside down or tilt it slightly, watching for leaks around the seal. Finally, reassemble and run a short blend cycle. If water leaks during this test, the seal needs replacing. Regularly performing seal checks like this guarantees your appliance stays leak-free and prolongs its lifespan.
Frequently Asked Questions
Can a Damaged Blade Assembly Cause Leaks Besides the Seal?
Yes, a damaged blade assembly can cause leaks beyond seal issues. When blades are bent, cracked, or loose, they may create gaps or misalignments that allow liquids to escape, compromising seal integrity. This damage can also cause vibrations or wobbling, which further stresses the seal and leads to leaks. Regularly examining your blade assembly for damage helps guarantee your blender operates smoothly and prevents leaks caused by blade damage.
Are There Specific Types of Blenders More Prone to Bottom Leaks?
Certain blender models are more prone to bottom leaks due to their material and design flaws. For example, plastic blenders may develop cracks over time, especially if exposed to high heat or rough use. Additionally, low-cost or poorly designed blenders often have weak seals or flawed construction, increasing leak risks. You should regularly check the blender’s material quality and design features to prevent leaks and guarantee durability.
How Often Should I Inspect or Replace the Blender’s Seal?
Think of your blender’s seal as the heartbeat of its safety. You should inspect the seal every 3 to 6 months, like checking the pulse of a trusted friend. If you notice cracks, tears, or wear, replace it promptly. Regular seal maintenance keeps leaks at bay and ensures smooth blending. Don’t wait for a drip—stay vigilant with your inspection frequency and keep your blender humming happily.
Does Overfilling the Blender Increase the Risk of Leaks?
Yes, overfilling your blender increases the risk of leaks. When you put too much liquid or ingredients, the blender can’t contain everything properly, leading to liquid spillage or leaks from the bottom. To avoid this, always follow the recommended fill line, and don’t overfill. This helps prevent excess pressure and keeps your blender working smoothly without messy liquid spillage.
Can Using Incompatible Accessories Lead to Leaks From the Bottom?
Imagine a puzzle with mismatched pieces—using incompatible accessories can cause leaks from the bottom. When you ignore accessory compatibility, you risk compromising the seal integrity, allowing liquids to seep out. Always check that your accessories fit perfectly, like a lock and key, to keep your blender sealed tight. Proper compatibility maintains the seal’s strength, preventing leaks and ensuring your blending experience stays clean and efficient.
Conclusion
Regularly checking your blender’s seal can prevent leaks and extend its lifespan. Did you know that over 60% of appliance repairs are caused by simple seal issues? Taking a few minutes to inspect and maintain your blender now can save you money and hassle later. Don’t wait for leaks to cause bigger problems—stay proactive and keep your blender running smoothly for years to come.