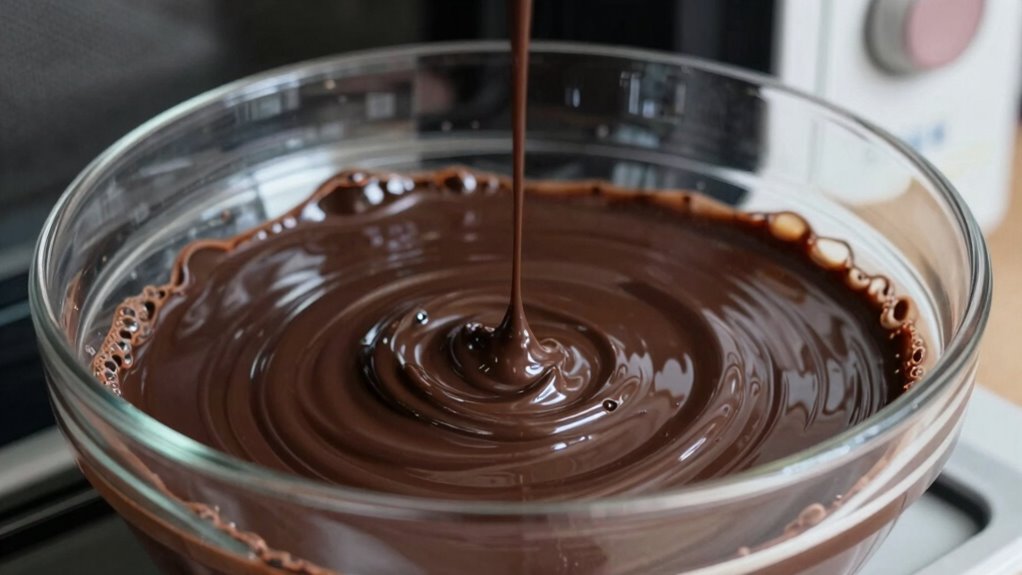
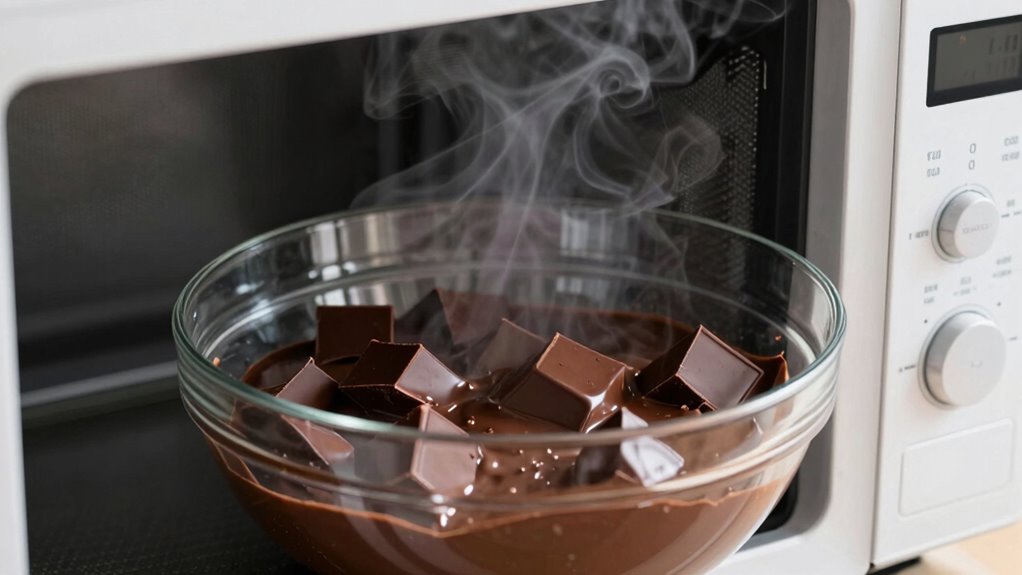
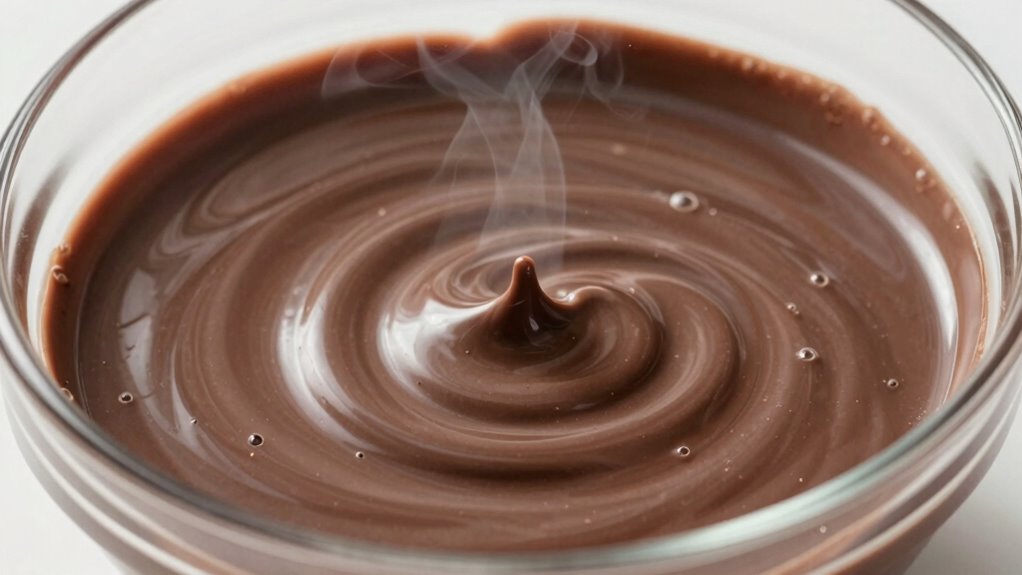
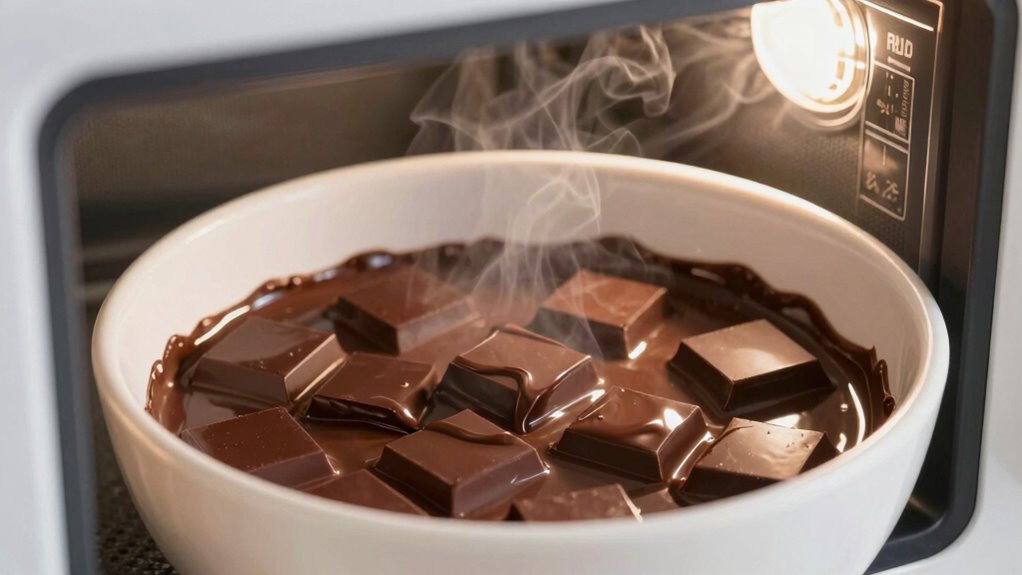
To melt chocolate in a microwave without burning, follow the interval rule: set your microwave to 50% power and heat in short bursts of 15-20 seconds. After each, stir thoroughly to distribute heat evenly. Keep an eye on the texture and temperature, stopping once the chocolate looks glossy and smooth. Proper technique is key, and if you’re curious about mastering every step, you’ll find useful tips to perfect your melt.
Key Takeaways
- Use 50% power and heat in short 15-20 second intervals to prevent overheating.
- Stir thoroughly after each interval to distribute heat evenly and avoid hotspots.
- Monitor temperature closely with a thermometer to prevent reaching seizing or burning points.
- Stop microwaving once chocolate is smooth and glossy, indicating proper melting.
- Keep water away from the chocolate to prevent seizing and texture issues during melting.
Glass Mixing Bowls with Lids Set of 5(4.78QT,2.2QT,1.7QT,1.1QT,0.85QT),Thick Glass Nesting Bowls for Kitchen Baking,Cooking Prep,Storage,Serving,Large Salad Bowls,Dishwasher Microwave Freezer Safe
Premium Food-Grade Material: The glass mixing bowls are made of high borosilicate glass, featuring a thickened design for…
As an affiliate, we earn on qualifying purchases.
As an affiliate, we earn on qualifying purchases.
Why Microwaving Chocolate Can Burn or Seize It
Microwaving chocolate can easily lead to burning or seizing because chocolate contains fats and sugars that are sensitive to high heat. If you don’t regulate the temperature carefully, the chocolate’s texture can change rapidly, turning grainy or lumpy. Too much heat causes the fats to separate, resulting in burning and a ruined consistency. Seizing happens when the chocolate overheats and the sugars and fats solidify, making it thick and difficult to work with. To prevent this, you need to maintain gentle, steady heat, stopping the microwave before the chocolate gets too hot. Proper temperature control ensures your chocolate melts smoothly, preserving its silky texture and making it easier to incorporate into recipes. Always melt in short intervals and stir regularly to avoid overheating. Additionally, using appropriate filtration techniques can help prevent chocolate from overheating due to uneven heat distribution. Incorporating a melting technique like this can help ensure even heat distribution and better control over the melting process. Being aware of temperature regulation is crucial for achieving a perfect melt without seizing. Employing a temperature monitoring method can further improve your control during the melting process, helping you avoid common pitfalls. Applying proper techniques can also significantly reduce the risk of burning or seizing your chocolate.

Lightbeam Digital Candy Thermometer, Instant Read Kitchen Cooking & Spatula Thermometer Temperature Reader & Stirrer in One BPA Free Food Grade Material
Essential Kitchen Tool: This candy spatula thermometer is a versatile and indispensable tool for cooking, baking, and candy-making…
As an affiliate, we earn on qualifying purchases.
As an affiliate, we earn on qualifying purchases.
Tools and Ingredients You Need to Melt Chocolate Safely
To melt chocolate safely in the microwave, you’ll need the right tools, like a microwave-safe bowl and a spatula. Make sure you have quality chocolate and a little bit of oil or shortening if needed to prevent sticking. Remember to follow safety tips, such as heating in short bursts and avoiding water contact to prevent burning or seizing. Additionally, ensuring proper airflow around the unit can help prevent overheating during the process.
Tools for Melting Chocolate
Before melting chocolate in the microwave, gather the right tools and ingredients to guarantee a smooth process. Use a microwave-safe bowl, preferably glass or ceramic, to assure even heat distribution. A silicone spatula is essential for stirring gently without damaging the chocolate. To achieve perfect chocolate tempering and flavor enhancement, avoid metal bowls that can cause uneven heating. Keep a kitchen thermometer handy to monitor temperature and prevent burning. A microwave with adjustable power settings helps control heat intervals, reducing the risk of scorching. Having a damp towel nearby allows you to set the bowl securely and prevent slipping. With these tools, you’ll better control the melting process, preserving chocolate’s shine, texture, and flavor. Proper tools are key for safe, effective microwave melting.
Essential Ingredients Needed
Having the right ingredients is essential for melting chocolate safely and effectively. First, choose high-quality chocolate varieties like dark, milk, or white chocolate, depending on your preference. Each type melts differently, so select accordingly. If you run out of your preferred chocolate, ingredient substitutes such as chocolate chips or baking bars work well, provided they contain cocoa butter for smooth melting. Avoid using chocolate with added ingredients like nuts or caramel during melting, as they can cause uneven heating. Use fresh, clean utensils to prevent contamination and ensure smooth melting. Remember, the key is to use simple, compatible ingredients to avoid burning or seizing. Additionally, understanding the concept of free floating can help in maintaining an even temperature during melting, preventing burning or seizing. Incorporating temperature control techniques is also vital for a successful melting process. Using a microwave-safe container and avoiding abrupt temperature changes can also help prevent thermal shock. For added safety and quality, choosing vetted products from trusted sources like Witbeck Vacuums can be beneficial. Being aware of the affiliate disclosure can also guide you in choosing quality products through trusted sources.
Safety Tips and Precautions
Safety is essential when melting chocolate in a microwave, as improper handling can lead to burns or ruined results. Always use microwave-safe bowls to prevent accidents, and avoid overfilling to prevent spills. Be aware of chocolate allergies; if anyone has a known allergy, choose allergy-safe alternatives or avoid consumption altogether. When melting chocolate, keep an eye on microwave safety by using short intervals and stirring frequently to prevent overheating or burning. Remember that some chocolates may contain additives that react poorly if overheated, so stay attentive. Never leave melting chocolate unattended, and use oven mitts to handle hot containers. Following these safety tips helps protect your health while ensuring your chocolate melts smoothly and safely. Additionally, understanding microwave safety can help prevent accidents and ensure even melting. Incorporating smart home automation devices like timers or smart plugs can further enhance safety by alerting you when to check on your melting chocolate. Being aware of proper handling techniques also contributes to a safer melting process and better results. Always keep a fire extinguisher nearby when working with heat sources to be prepared for any emergencies.

4 Pcs Silicone Jar Spatula, Non-Stick Heat Resistant Cake Cream Spatulas Set, 9.8 inch Cake Cream Butter Spatulas(4 colors)
Uncompromised Quality: Our spatulas are crafted from the finest food-grade silicone, ensuring they're BPA-free and remain odor-free, making…
As an affiliate, we earn on qualifying purchases.
As an affiliate, we earn on qualifying purchases.
How to Use the Interval Rule for Perfectly Melting Chocolate
To melt chocolate perfectly in the microwave, it’s essential to use the interval rule. This method prevents burning and guarantees smooth, glossy results. Set your microwave to 50% power, then heat in 15-20 second bursts. After each interval, gently stir the chocolate to evenly distribute heat and check its consistency. This process helps you master tempering techniques and preserves delicate flavor infusions. Remember, patience is key—rushing leads to seizing or scorching. Use the following table to visualize your melting process:
| Step | Action | Goal |
|---|---|---|
| 1 | Microwave at 50% power | Gentle heat |
| 2 | Stir after each interval | Even temperature |
| 3 | Repeat until smooth | Perfect consistency |
Mastering this rule makes your chocolate silky, ideal for chocolate crafts or flavor infusions. Proper temperature control is crucial for preventing overheating and achieving the desired texture. Practicing the interval rule consistently will improve your overall melting technique and ensure better results every time. Additionally, using a microwave-safe ceramic or glass bowl can help distribute heat more evenly and prevent hot spots that might scorch the chocolate. Being aware of the melting point of chocolate can further help you avoid overheating and ensure a glossy finish.

DD-life 3 Pcs Silicone Chocolate Melting Pot, Butter Sauce Milk Microwave Baking Pouring Tool
Material: Made of high quality silicone.
As an affiliate, we earn on qualifying purchases.
As an affiliate, we earn on qualifying purchases.
Stir and Monitor: Tips for Avoiding Burning or Seizing

To prevent burning or seizing, you should use short intervals and stir the chocolate often. Keep a close eye on it as it melts, and don’t rush the process. Monitoring closely helps make certain a smooth, even melt without overheating. Additionally, understanding the importance of proper temperature control can make all the difference in achieving perfect results. Being aware of lease terms and other financial factors can also help you plan your approach to the project effectively. Paying attention to melting techniques can further improve your success and prevent common mistakes. Incorporating consistent stirring techniques ensures even heat distribution and prevents hotspots that can lead to burning.
Use Short Intervals
Because chocolate heats quickly and unevenly, it’s best to melt it in short bursts, stirring frequently. This approach helps you maintain the ideal chocolate texture and prevents burning. Use a microwave set to low or medium power to control the heat more effectively. During each interval, check the chocolate’s consistency and look for signs of seizing or burning.
Remember:
- Keep intervals short, around 15-20 seconds
- Stir thoroughly after each burst
- Watch for smooth, glossy texture
- Adjust microwave power if chocolate starts to seize
This method ensures even melting while avoiding overheating. The key is patience and careful monitoring, especially with high microwave power, to achieve perfectly melted chocolate without burning.
Stir Frequently During
Stirring frequently as you melt chocolate helps distribute heat evenly and prevents hotspots that can cause burning or seizing. When you stir often, you maintain a smooth chocolate texture and avoid uneven melting. This is especially important around the melting temperature, where chocolate can quickly seize if overheated. Regular stirring helps keep the chocolate at a consistent temperature, reducing the risk of burning. It also ensures the heat is transferred uniformly throughout, preventing clumps or solidified bits. As you work, monitor the texture and temperature closely, stirring gently but consistently. This approach allows you to melt chocolate smoothly and safely, giving you better control over the process. Consistent stirring is a simple yet effective technique to achieve perfectly melted chocolate without risking damage or uneven consistency.
Watch for Melting
As the chocolate begins to melt, it is crucial to stay attentive and monitor its progress closely. Keep a close eye on the temperature control to prevent overheating, which can cause the chocolate to seize or burn. Watch for the chocolate texture to become smooth and glossy—any lumps or dullness indicate it’s not ready yet. Stir gently but frequently to distribute heat evenly and avoid hot spots. Be ready to stop microwaving as soon as you see the chocolate melting smoothly, even if it’s not fully liquid. This prevents residual heat from continuing to melt it past the ideal point. Remember, patience and careful monitoring are key to achieving perfect, burn-free melted chocolate every time.
Troubleshooting Common Chocolate Melting Problems
When melting chocolate in the microwave, it’s common to encounter issues like burning, seizing, or uneven melting. One key factor is chocolate texture; if chocolate becomes too hot too quickly, it can seize or turn grainy. To prevent this, consider your microwave wattage—higher wattage cooks faster and increases burn risk. Use shorter intervals and stir frequently to distribute heat evenly, avoiding hotspots that cause uneven melting. If chocolate seizes, it may become thick and lumpy, indicating it’s overheated. Lowering the wattage or reducing the melting time helps maintain smoothness. Always keep a close eye and stir often. Adjusting your approach based on your microwave’s wattage ensures a smoother, more consistent melting process without burning or seizing.
What to Do If Your Chocolate Seizes or Doesn’t Melt Properly
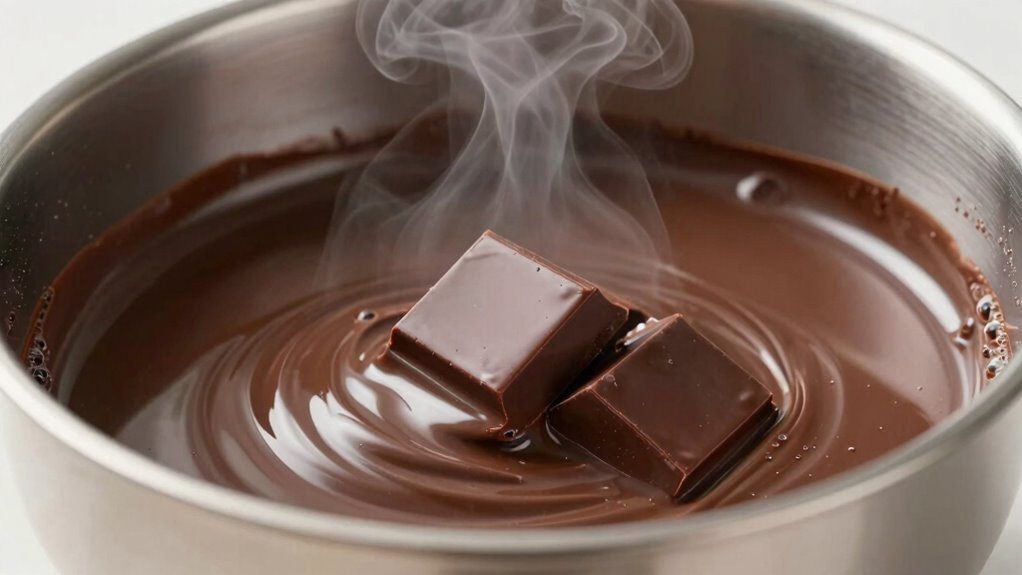
If your chocolate has seized or isn’t melting properly, don’t panic. Chocolate seizing happens when moisture or overheating causes it to turn lumpy and thick, disrupting the proper chocolate consistency. To fix this, try these steps:
If chocolate seizes, add oil, reheat gently, and avoid water to restore smoothness.
- Add a small amount of vegetable oil or shortening to restore smoothness.
- Gently reheat in short bursts, stirring constantly.
- Use a double boiler if microwave adjustments aren’t working.
- Avoid adding water, which causes seizing and worsens the problem.
Frequently Asked Questions
Can I Melt White or Milk Chocolate Using the Same Interval Rule?
Yes, you can melt white or milk chocolate using the same interval rule. Just like with dark chocolate, you should microwave white and milk chocolate in short, 15-20 second bursts. Stir thoroughly after each interval to prevent burning or uneven melting. Keep a close eye, as white and milk chocolates can scorch more easily. This method helps you melt these chocolates smoothly without risking burning.
What Type of Microwave Is Best for Melting Chocolate Evenly?
You should use a microwave with adjustable wattage for even chocolate melting. A high wattage microwave heats quickly, so lower it to avoid burning. For better results, opt for a ceramic or glass bowl, as they distribute heat evenly and don’t retain static like plastic. Ceramic bowls are more durable and heat-resistant, making them ideal. Always use short intervals, stirring frequently, to prevent overheating and guarantee smooth, melted chocolate.
How Do Different Chocolate Brands Affect Melting Times?
Different chocolate brands affect melting times because of flavor variations and melting point differences. You’ll find that darker chocolates generally melt faster due to their higher cocoa content, while milk and white chocolates might take a bit longer. Some brands also add stabilizers or fats that influence melting speed. Pay attention to these factors, and adapt your microwave intervals accordingly, to prevent burning and ensure smooth melting every time.
Is It Safe to Add Butter or Cream While Melting Chocolate in the Microwave?
Yes, you can add dairy additives like butter or cream while melting chocolate in the microwave. They help with flavor enhancements and create a smoother, more workable consistency. Just add small amounts gradually, stirring well after each addition to prevent overheating or seizing. Be cautious, as too much dairy can alter the texture or cause the chocolate to seize. Keep an eye on it for a perfect, creamy melt.
Can I Use a Microwave-Safe Plastic Bowl for Melting Chocolate?
Yes, you can use a microwave-safe plastic bowl for melting chocolate. Just make certain the plastic container is labeled microwave-safe to prevent melting or releasing harmful chemicals. Check the packaging for microwave safety symbols or instructions. Plastic is compatible with microwave heating if it’s designed for that purpose. Always monitor the process closely to avoid overheating, and use oven mitts when handling hot containers.
Conclusion
Remember, patience is key when melting chocolate in the microwave. Follow the interval rule, stir often, and keep a close eye to avoid burning or seizing. As the saying goes, “Haste makes waste,” so take your time for smooth, perfectly melted chocolate. With a little care and attention, you’ll enjoy glossy, luscious results every time—no shortcuts needed. Happy melting!