
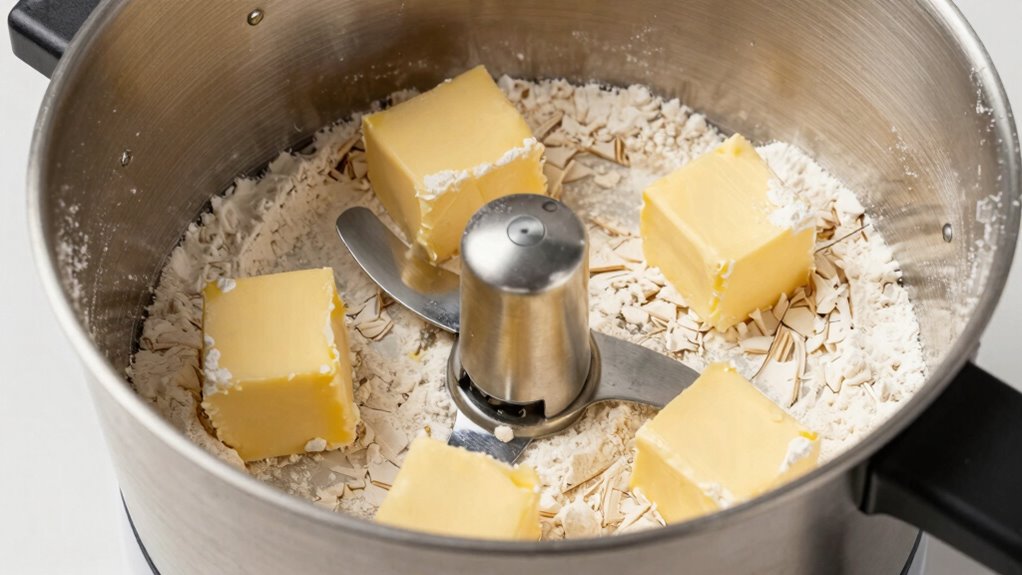
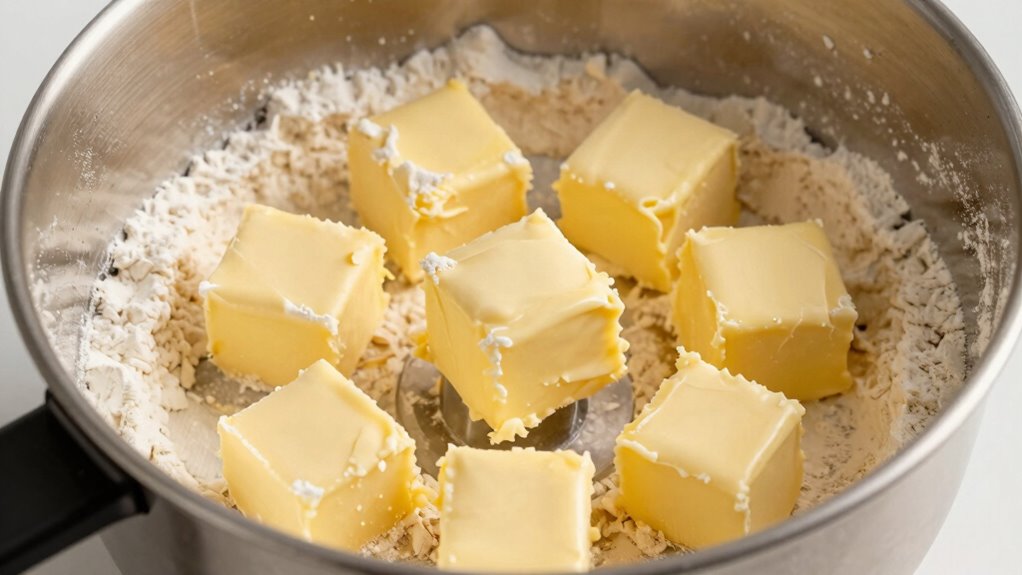
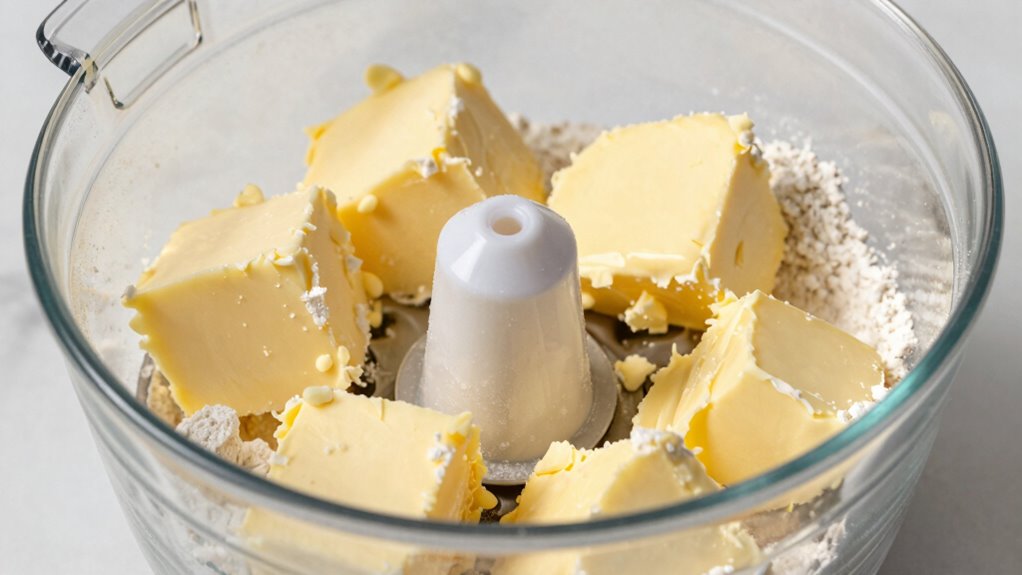
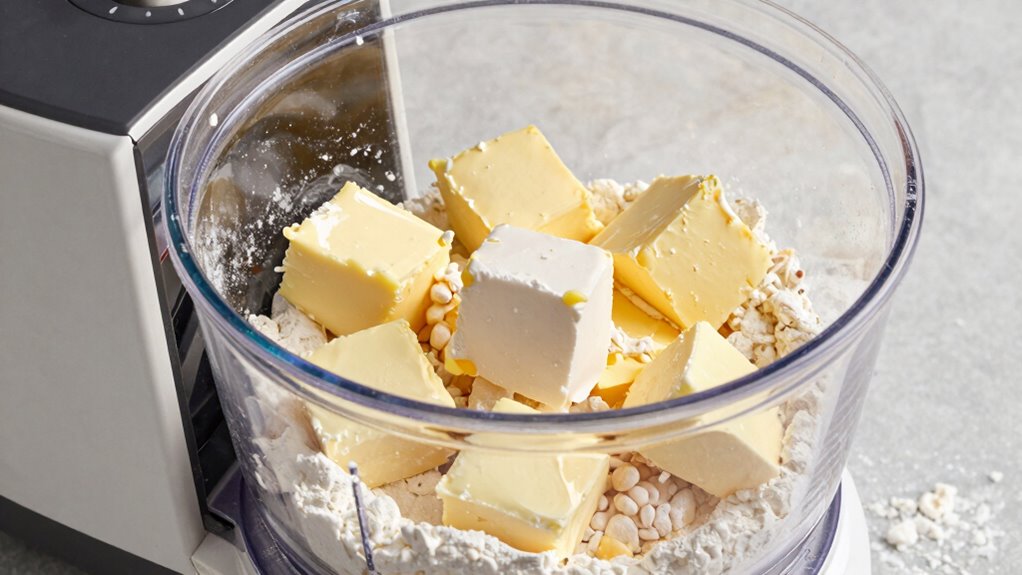
For flaky pie crusts made in a food processor, you’ll want to cut your cold butter into small, uniform pieces roughly the size of peas. Using about 1/4 to 1/3 cup of butter per 1 1/4 cups of flour works best. Larger chunks create more layered flakiness, while smaller bits make a tender crust. Proper butter sizing and gentle pulsing are key—keep the butter cold and stop pulsing once just combined. Learn more about perfecting your crust techniques.
Key Takeaways
- Use butter chunks roughly the size of peas for optimal flakiness.
- Larger butter pieces create vapor pockets, resulting in flaky layers.
- About 1/4 to 1/3 cup of butter per 1 1/4 cups of flour is ideal.
- Uniform, cold butter pieces prevent uneven melting and dense crusts.
- Avoid overmixing to maintain butter’s integrity and achieve tender, flaky crusts.
How to Make Flaky Pie Crusts Using a Food Processor
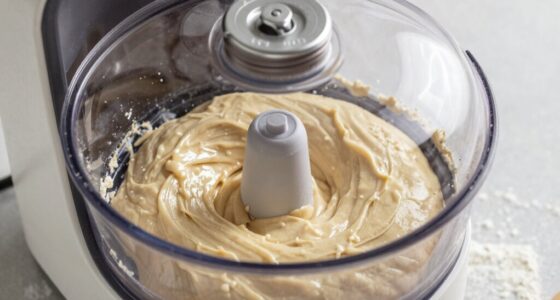
Making flaky pie crusts in a food processor is quick and straightforward. To get that perfect texture, pay attention to dough hydration—adding the right amount of cold water helps achieve the ideal consistency. Too much water makes the dough sticky, while too little results in a dry crust. As you pulse the ingredients, the food processor’s blades gently combine the flour and butter, promoting gluten development without overworking the dough. This balance creates a tender, flaky crust with layers that separate easily. Keep the process gentle; overmixing can toughen the dough by developing too much gluten. Once the dough just comes together, stop pulsing. Proper hydration and minimal gluten development are key to achieving that classic flaky texture in your pie crust.
Why Butter Size Matters for Achieving Flakiness in Pie Crusts
The size of butter pieces you use directly impacts the texture and flakiness of your pie crust. Larger butter chunks create pockets that vaporize during baking, resulting in a tender, flaky crust. Smaller pieces melt more evenly, producing a denser, less layered crust. When sourcing butter, opt for high-quality options with good butter flavor, as this enhances the overall taste and contributes to better flakiness. Consistent butter sizing ensures uniform distribution, which is vital for achieving that delicate balance of crispness and tenderness. By controlling butter size, you influence how the crust develops its characteristic layers, making your pie crust flaky and flavorful. Additionally, butter temperature plays a crucial role in how well the butter incorporates into the dough, affecting flakiness and texture. Paying attention to butter sizing techniques helps ensure your crust turns out perfectly flaky every time. Properly measuring butter also guarantees consistency in your crust’s texture, making each bake reliably flaky and delicious. Using sound mixing methods can help prevent overworking the dough, which is essential for maintaining flakiness. Being mindful of butter distribution during mixing can further improve the evenness of your crust’s layers. So, pay attention to your butter pieces—they’re essential for a perfectly flaky, delicious crust.
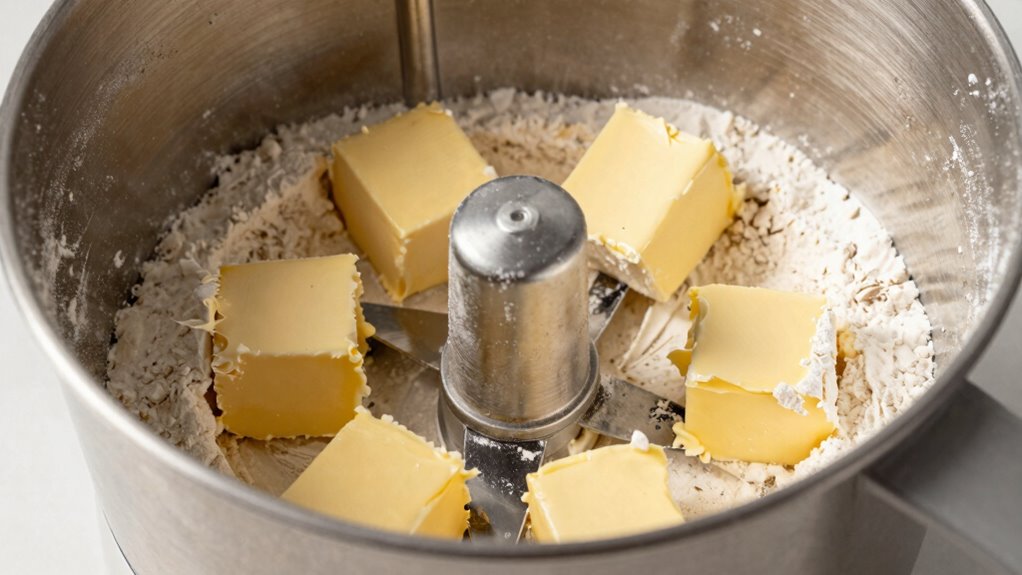
How to Cut Butter Into Small, Even Pieces in a Food Processor
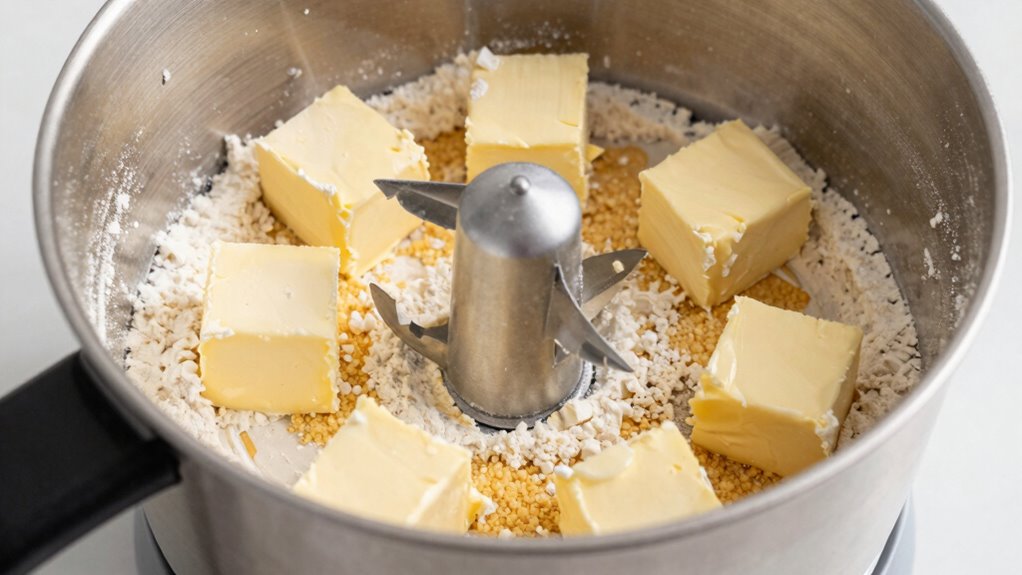
Start by using cold butter so it stays firm during processing. Pulse the food processor in short bursts to prevent the butter from melting or clumping together. Aim for even-sized pieces to guarantee a flaky, consistent crust. For optimal results, ensure the butter is cut into small, uniform pieces before processing. Additionally, using appropriate tools can help achieve more precise and consistent butter sizes.
Use Cold Butter
For the best results, keep your butter cold when cutting it into small, even pieces in a food processor. Cold butter maintains a lower butter temperature, which helps create a flaky crust. If your butter warms up, it can blend too much into the flour, resulting in a less desirable dough consistency. To guarantee optimal texture, use chilled butter straight from the fridge. When cutting, work quickly to prevent warming and avoid over-processing. Cold butter pieces should be roughly the size of peas, which promotes even distribution. This technique ensures your dough remains tender yet flaky, achieving the perfect balance for a crisp crust. Always prioritize cold butter to control the dough’s texture and guarantee a successful, flaky pie crust. Additionally, understanding the importance of body jewelry measurements and materials can help you select the best ingredients for your baking needs. Incorporating high-quality, trusted ingredients can enhance the flavor and consistency of your pastry. Properly maintaining your kitchen tools and equipment also contributes to better baking results. Maintaining cool kitchen conditions during preparation can further improve the quality of your dough.
Pulse in Short Bursts
To cut cold butter into small, even pieces in a food processor, pulse in short bursts rather than continuous runs. This technique helps you control the butter distribution, ensuring pieces stay uniformly sized without overmixing. Using brief pulses allows you to monitor the consistency and prevent the butter from becoming too smooth or melting into the flour. Proper mixing techniques hinge on this controlled pulsing, which creates a breadcrumb-like texture ideal for flaky crusts. Avoid running the processor continuously, as it can quickly break down the butter too much, resulting in uneven pockets or a dough that’s too pasty. By pulsing in short bursts, you maintain better control over the size of the butter pieces, setting the stage for ideal flakiness in your pie crust. Regular checks during pulsing help prevent overheating and maintain the right oil consistency, which is crucial for a tender, flaky crust. Additionally, understanding the role of proper butter size in achieving flaky layers is essential for perfect pastry results. Incorporating this technique ensures you achieve the ideal butter distribution, leading to a beautifully flaky crust with each bake. Monitoring the process closely also helps prevent the butter from melting, which is key to maintaining the flakiness of your crust. Paying attention to the butter size during pulsing ultimately supports consistent, high-quality results.
Maintain Even Pieces
Maintaining even-sized butter pieces is key to achieving a flaky pie crust. When cutting butter in your food processor, aim for uniform chunks roughly the size of peas. This ensures consistent mixing and ideal flakiness. The size of the butter pieces influences the cookie types you can make and how they bake at different oven temperatures. For instance, larger pieces create a more layered crust, ideal for hearty pies, while smaller pieces produce a tenderer bite. Use the following guide for butter sizes:
| Butter Size | Suitable Cookie Types | Oven Temperature Tips |
|---|---|---|
| Pea-sized | Shortbread, sugar cookies | Bake at 350°F for even browning |
| Grain-sized | Pie crusts, tart shells | 375°F for flaky, crisp texture |
| Walnut-sized | Croissants, Danish | 400°F for crisp exterior |
| Small chunks | Biscotti, biscotti-style | 325°F for dense cookies |
| Large chunks | Rustic tarts, galettes | 375°F-400°F for flaky layers |
Consistency in butter size helps you control bake results across cookie types and oven temperatures. Additionally, uniform butter pieces promote better incorporation and texture in your baked goods. Properly sized butter pieces are also important for baking consistency, ensuring each batch turns out perfectly every time.
What Butter Sizes Are Best for Flaky Pie Crusts

Using the right butter sizes is key to achieving a flaky pie crust. You’ll want to contemplate the optimal butter ratios and whether to use cold or slightly warm butter for your dough. Adjusting these factors can help you control flakiness and get the perfect crust every time. Additionally, understanding how virtual reality comfort impacts your experience can be useful if you’re exploring new techniques or tools to improve your baking setup. Considering baking safety practices ensures your process remains safe and effective as you experiment with different butter textures. Recognizing ingredient quality can also influence the overall success of your flaky crust. For best results, paying attention to butter temperature can significantly affect how well your dough layers and flakes during baking.
Optimal Butter Ratios
Choosing the right amount of butter is essential for achieving a flaky pie crust, and the size of butter pieces can make a significant difference. Typically, using about 1/4 to 1/3 cup of butter per 1 1/4 cups of flour creates a balanced ratio that results in flakiness. Too much butter can make the crust greasy, while too little may yield a dense texture. For dairy alternatives or gluten-free options, maintaining this ratio is key, but you might need to adjust slightly based on ingredient moisture content. For example, coconut oil or vegan butter can be used instead of traditional butter, but keep an eye on their fat content to preserve the flaky layers. Striking the right butter ratio guarantees your crust is tender, flaky, and perfect every time.
Cold vs. Warm Butter
Cold butter is essential for creating a flaky pie crust because it prevents the fat from melting too quickly during baking, allowing layers to form. When butter stays cold, it helps achieve that tender, airy texture you desire. Proper butter storage—keeping butter chilled until use—ensures your dough remains workable and flake-worthy. Using warm butter can result in a denser crust, as the fat melts prematurely. If you don’t have cold butter, ingredient substitutions like frozen butter or chilling your food processor can help. Remember, the right butter temperature makes all the difference.
- Feel the excitement of perfect, flaky layers
- Savor the crisp, tender bite with confidence
- Trust your ingredients for consistent results
- Celebrate your baking mastery
- Enjoy every flaky, buttery moment
Adjusting for Flakiness
To achieve a perfectly flaky pie crust, it’s important to contemplate the size of the butter pieces you incorporate. Larger butter chunks create pockets that steam during baking, resulting in a tender, flaky texture. If your goal is extra flakiness, opt for bigger butter pieces to enhance dough elasticity, allowing layers to lift and separate easily. Smaller bits produce a more uniform, tender crust but may reduce flakiness. Keep in mind that crust moisture also affects flakiness; too much moisture can make the dough tough, while too little can cause cracks. Adjust your butter size accordingly: larger pieces for more flakiness and slightly less moisture, ensuring the dough remains pliable yet crumbly enough to form a flaky crust.
Tips to Add Butter Without Overmixing Your Pie Dough
Adding butter to your pie dough without overmixing is essential for a flaky crust. To achieve this, gently incorporate small chunks of butter by pulsing your food processor just until the mixture resembles coarse crumbs. Keep the butter visible for that perfect flaky texture. When working with sugar substitutes or gluten-free options, be especially careful to avoid overmixing, as these ingredients can affect dough cohesion.
Here are tips to help:
- Use short pulses instead of continuous mixing
- Keep butter cold and cut into small pieces
- Add butter gradually, not all at once
- Stop mixing as soon as coarse crumbs form
- Chill dough before rolling out to prevent overworking
These steps keep your dough tender and flaky, ensuring a perfect crust every time.
How to Tell When Your Dough Is Ready for Baking

Knowing when your dough is ready for baking guarantees your crust turns out perfectly flaky and tender. First, check the dough’s temperature; it should feel cool but pliable, ideally around 60°F to 65°F. If it’s too warm, refrigerate it briefly to firm up. When your oven is preheated to the right temperature—usually 375°F to 425°F—it’s a good indicator that your dough is prepared for baking. Gently press the dough; it should hold together without feeling sticky or crumbly. If it cracks when you try to shape it, it needs a few more minutes in the fridge. Properly rested and cooled dough will bake evenly, delivering that flaky, tender crust you’re aiming for.
Common Mistakes When Preparing Pie Crusts in a Food Processor and How to Avoid Them

One common mistake when preparing pie crusts in a food processor is over-processing the dough, which can lead to a tough, dense crust instead of a flaky one. To avoid this, pay attention to the texture; stop processing as soon as the ingredients just come together. Be mindful of common pitfalls like adding too much liquid or not chilling ingredients enough. Ingredient substitution can also cause issues—using butter instead of shortening, for example, may affect the dough’s flakiness.
Avoid these mistakes by:
- Pulsing briefly in short bursts
- Keeping ingredients cold
- Measuring accurately
- Using the right fat-to-flour ratio
- Resting the dough properly before rolling out
Troubleshooting: Why Your Pie Crust Isn’t Flaky Enough and How to Fix It

If your pie crust isn’t as flaky as you’d like, the problem often lies in how the dough is handled during mixing and shaping. Overworking the dough can develop gluten, making it tough instead of flaky. To fix this, consider using alternative ingredients like a touch of vinegar or cornstarch to enhance flakiness. Also, adjust your baking techniques: keep the dough cold, avoid overmixing in the food processor, and handle it gently when shaping. Using a light touch prevents the dough from becoming dense. Additionally, incorporating small amounts of ice water gradually helps maintain the right texture. These adjustments ensure your crust remains tender and flaky, resulting in a beautifully layered and crisp pie crust every time.
Final Tips for Consistently Baking Perfectly Flaky Pie Crusts
To consistently bake a flaky pie crust, focus on mastering a few simple techniques that guarantee each step contributes to the perfect texture. Proper dough kneading is key—you want just enough to bring the ingredients together without overworking it, which can toughen the crust. Using the right flour types, like pastry or all-purpose flour, helps achieve a tender, flaky result. Keep your ingredients cold to maintain the butter’s integrity and create those desirable layers. Resting the dough in the fridge allows gluten to relax, preventing shrinkage. Finally, handling the dough gently and minimally ensures flakiness stays intact.
- Feel confident knowing your dough is well-rested and chilled
- Trust the right flour types to deliver tenderness
- Embrace gentle dough kneading for perfect layers
- Keep ingredients cold for flaky perfection
- Celebrate your success with each buttery, flaky bite
Frequently Asked Questions
Can I Use a Regular Blender Instead of a Food Processor for Pie Crust?
Yes, you can use a regular blender instead of a food processor for pie crust, but be careful. A blender vs processor differ in how they handle cold butter and dough mixing. Your blender may not create as flaky a crust because it’s harder to control the butter size and distribution. As an alternative tool, pulse short bursts to prevent over-mixing, ensuring your crust stays tender and flaky.
How Does the Type of Butter Affect Crust Flakiness?
You’ll notice that butter quality and temperature greatly influence your crust’s flakiness. Using high-quality butter with a higher fat content creates more tender, flaky layers. Keep the butter cold, ideally just out of the fridge, to prevent it from melting too quickly. When you incorporate cold, good-quality butter, it creates pockets in the dough that turn into flaky layers during baking, giving your crust that perfect, crisp texture.
Is It Necessary to Chill the Dough Before Rolling Out?
Yes, you should rest the dough by chilling it before rolling out. Chilling techniques help relax the gluten and firm up the butter, making the dough easier to handle and ensuring a flaky crust. Resting the dough in the fridge for at least 30 minutes allows it to become more pliable, prevents shrinking during baking, and results in a better texture. So, don’t skip this essential step for perfect pie crusts.
Can I Substitute Margarine or Shortening for Butter?
Yes, you can substitute margarine or shortening for butter in your pie dough. Margarine substitution works well because it has a similar fat content, giving the crust a tender texture. Shortening is a good alternative that creates a flakier crust, but it may lack some richness. Keep in mind, using margarine or shortening might slightly alter the flavor, so choose based on your desired taste and texture.
How Do Different Flour Types Impact the Butter Size Needed?
Different flour types affect the butter size needed because higher gluten content and protein levels demand less fat to achieve the right flaky texture. For bread flour with more gluten, use smaller butter pieces to prevent toughness. For pastry or cake flour, larger butter chunks work better, creating a tender, flaky crust. Adjust your butter size based on these flour characteristics to optimize dough consistency and texture.
Conclusion
Now, picture a golden, flaky crust melting in your mouth with each bite—light as a whisper and perfectly crisp. By choosing the right butter size and handling your dough gently, you’ll craft pie crusts that shimmer with flaky layers and buttery goodness. With practice and patience, you’ll turn simple ingredients into a stunning, buttery masterpiece that makes every slice a moment to savor. Your perfect pie awaits—bake with confidence and enjoy the delicious results.