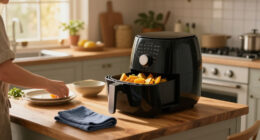
Use this guide to choose an air fryer that fits your counter or storage space, set it up safely, and cook without overcrowding it. It is for first-time buyers and anyone replacing a bulky appliance in a small kitchen. The steps take about 30-60 minutes, including measuring your space and checking the appliance manual; cooking takes additional time.

Get kitchen staples and gadgets delivered free — and shop member deals
- Fast, free delivery on millions of items
- Access to Prime Big Deal Days deals on October 6–7
- Prime Video, Amazon Music and more included
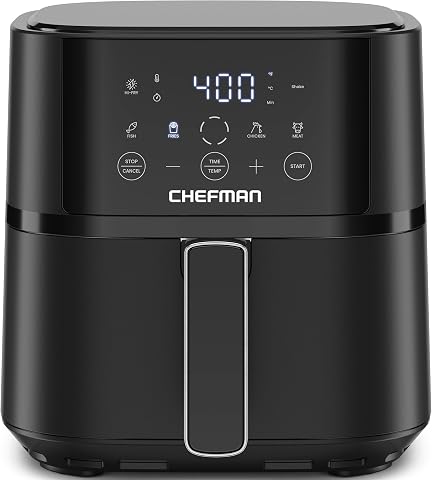
Chefman 4-Quart Compact Air Fryer with Hi-Fry Technology
- ✔ Capacity: 4 quarts
- ✔ Power: 1500 W
- ✔ Controls: Digital touchscreen

Chefman 2-Quart Digital Mini Air Fryer, Black
- ✔ Capacity: 2 quarts
- ✔ Power: 900 watts
- ✔ Dimensions: 10 × 10 × 8.3 inches

Kismile 5-Quart Glass Air Fryer with Digital Touch Controls
- ✔ Capacity: 5 qt
- ✔ Power: 1500 W
- ✔ Basket material: BPA-free glass
Difficulty: Beginner | Time: 30-60 minutes to choose and set up; cooking time varies by recipe
What You’ll Need
Tools & Materials:
- Tape measure or ruler
- A clear counter space near a suitable electrical outlet
- Air fryer product dimensions and owner’s manual
- Access to the appliance’s cleaning instructions
Knowledge:
- Basic kitchen and electrical safety
- Approximate number of people you usually cook for
Check the dimensions of the whole appliance, including its handle and any room needed to open the basket or lid. Product capacity alone does not show how much counter space the appliance needs.
Chefman 4-Quart Compact Air Fryer with Hi-Fry Technology
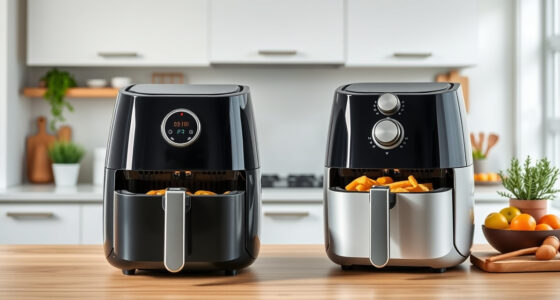
The Chefman 4-Quart Compact is the most balanced choice here for households that need more than a solo portion but cannot dedicate a large stretch of counter space. Its capacity is notably more flexible than the 2-quart mini’s, while remaining below Kismile’s 5-quart basket. The listed description positions it for meals serving two to four people, making it a plausible everyday middle ground.Its differentiator is Hi-Fry technology, which raises the temperature to 450°F during the final two minutes. That offers a targeted crisping boost without adding a specialized cooking mode to learn. Four presets keep operation simpler than Kismile’s eight, though buyers who want broad preset selection may prefer the glass model. An audible halfway alert and automatic shutoff help with routine use; dishwasher-safe basket and rack also make cleanup less of a chore.The compromise is that four quarts still may not cover a larger household or a full meal cooked in one batch. It also has no smart connectivity or advanced cooking modes listed, and the available details do not state its dimensions. Compared with the 2-quart Chefman, it asks for more room but serves more people; compared with Kismile, it trades some capacity and preset variety for a focused crisping feature and a clear medium-size role.
Pros:
- 4-quart capacity is a practical middle ground for two to four people.
- Hi-Fry raises the temperature to 450°F for the final two minutes.
- Dishwasher-safe basket and rack simplify cleanup.
- Halfway alert and automatic shutoff add useful cooking and safety cues.
Cons:
- Four quarts may be insufficient for larger households or batch cooking.
- No smart connectivity or advanced cooking modes are listed.
- Product dimensions are not provided in the supplied details.
Best for: Small-kitchen households of two to four people who want a versatile everyday basket and an extra-crisp finish.
Not ideal for: Solo cooks with very limited storage, or larger households that routinely need bigger batches.
Bottom line: For the broadest mix of compactness and everyday usefulness, we’d choose the Chefman 4-Quart, provided its unlisted dimensions suit the available counter space.
“For the broadest mix of compactness and everyday usefulness, we’d choose the Chefman 4-Quart, provided its unlisted dimensions suit the available counter space.”
Chefman 2-Quart Digital Mini Air Fryer, Black
When counter or cabinet space is the first constraint, the Chefman 2-Quart Mini makes the clearest case. At 10 × 10 × 8.3 inches and 5.9 pounds, it is the only option here with a stated compact footprint and weight, so buyers can better assess whether it will fit a shelf or worktop. Its square basket also makes good use of its small capacity.This is designed for one or two people, and that limit is the defining tradeoff. Compared with the 4-quart Chefman, it occupies less space but requires smaller batches; compared with Kismile, it is substantially more explicit about dimensions but lacks the larger basket and see-through glass. Touch controls, an audible shake reminder, automatic shutoff, and dishwasher-safe nonstick basket and rack keep the essentials in place without adding complexity.The 900-watt rating and 400°F ceiling are lower than the 4-quart model’s 1500 W and 450°F Hi-Fry stage. That does not make it unsuitable for modest portions, but it leaves less headroom for buyers seeking the crisping boost described for its larger sibling. Its little-to-no-oil positioning may appeal to everyday cooks, though capacity—not extra features—is its main advantage. Choose it if compact storage matters more than serving several people at once.
Pros:
- Stated dimensions of 10 × 10 × 8.3 inches help with fit planning.
- Lightweight at 5.9 pounds for easier moving and storage.
- Dishwasher-safe nonstick basket and rack.
- Shake reminder and automatic shutoff support routine cooking.
Cons:
- Two-quart capacity is limited to meals for one or two people.
- 900 W and a 400°F maximum offer less headroom than the 4-quart model’s crisping stage.
- Smaller batches can mean cooking in rounds when serving more people.
Best for: People cooking for one or two who want a lightweight appliance with stated dimensions for a tight counter or cabinet.
Not ideal for: Families, frequent hosts, or anyone who wants to cook larger batches without multiple rounds.
Bottom line: We recommend the 2-quart Mini when its small, documented footprint matters more than batch size or higher-heat finishing.
“We recommend the 2-quart Mini when its small, documented footprint matters more than batch size or higher-heat finishing.”
Kismile 5-Quart Glass Air Fryer with Digital Touch Controls
The Kismile 5-Quart Glass Air Fryer suits buyers who want more room and a clear view of the food as it cooks. Its BPA-free glass basket lets us monitor browning without opening the unit, while its five-quart capacity exceeds both Chefman options. That makes it the strongest fit of the three for a buyer who wants a larger batch and values visibility more than the smallest possible appliance.Eight presets give it the widest listed selection in this group, twice the Chefman 4-Quart’s four. A digital touch panel, 60-minute timer, and adjustable 100–400°F range cover common cooking adjustments. The detachable bottom tray and basket are dishwasher-safe, and the oil-separating base is intended to reduce excess grease. Against the Chefman 4-Quart, Kismile offers more capacity and a glass cooking vessel, but it lacks the listed 450°F finishing stage. Against the 2-quart mini, it is clearly the larger-batch option, with a likely greater space commitment.That last tradeoff deserves attention in a small kitchen: the supplied specifications do not include exterior dimensions, so capacity alone cannot tell us whether it will fit a particular counter or cupboard. Glass also prioritizes visibility over the familiar nonstick-basket format of the Chefman models. We’d choose it for its see-through basket and preset range, but buyers with very tight storage should verify its physical measurements before deciding.
Pros:
- 5-quart capacity is the largest among these three options.
- BPA-free glass basket makes it possible to monitor food as it cooks.
- Eight presets offer more one-touch choices than either Chefman model.
- Dishwasher-safe removable parts and oil-separating base support easier cleanup.
Cons:
- Exterior dimensions are not provided in the supplied specifications.
- Larger capacity may demand more counter or cabinet space than the Chefman mini.
- Its maximum temperature is 400°F, below the Chefman 4-Quart’s 450°F Hi-Fry stage.
Best for: Cooks who want a larger basket, a visible cooking process, and more preset choices, and who can confirm the appliance will fit.
Not ideal for: Anyone with a strict counter-space limit who needs published dimensions, or cooks who prioritize the highest stated finishing temperature.
Bottom line: Kismile is the capacity-and-visibility pick, as long as its unlisted dimensions fit the kitchen and the glass basket suits your preferences.
“Kismile is the capacity-and-visibility pick, as long as its unlisted dimensions fit the kitchen and the glass basket suits your preferences.”
As an Amazon Associate we earn from qualifying purchases.
Before You Start
Decide whether the air fryer will stay on the counter or be stored between uses. Check the manual for required clearance, ventilation, compatible cookware, and cleaning instructions. Air fryers release hot air and heat; do not plan to use one inside a closed cupboard, beneath a low shelf, or near curtains. Keep the cord away from the edge of the counter.
Check that the outlet can safely support the appliance. Follow the manual’s electrical guidance, and do not use an extension cord unless the manufacturer permits it. If your kitchen has limited outlets or the intended location is near water, choose another location.
Step-by-Step Instructions
Step 1: Measure the available space
Measure the counter area where you would use the air fryer. Record its width, depth, and height, then compare those measurements with the appliance’s listed dimensions. Leave the clearance stated in the manual on every side that needs ventilation. Allow room to pull out a basket fully or lift a lid without hitting a wall, cabinet, or another appliance.
If you plan to store the air fryer, measure the cupboard or shelf and the path you will use to move it. Include the handle and any detachable parts that need storage.
Tip: Do not assume a unit will fit just because its base fits. A basket needs space to slide out, and a top-opening model needs overhead room.
Check: You have a location that fits the appliance with the manual’s clearance, and you can open it fully without moving nearby items.
Step 2: Choose a capacity and shape
Pick a basket size based on the food you expect to cook at one time. A compact basket may suit one or two portions; cooking for more people may require batches or a larger model. Check the usable basket dimensions as well as the stated capacity, especially if you want to cook long foods such as fish fillets or vegetables.
Compare basket-style models with oven-style models. A basket model often has a smaller footprint and is simple to use for a few portions. An oven-style unit may offer racks and more cooking area, but it can take up more counter space. Choose the smallest model that can handle your usual meals without crowding the food.
Tip: If you make large batches only occasionally, cooking in two rounds may take less space than keeping a larger appliance on your counter every day.
Check: The selected model can fit your space and handle a typical meal in the number of batches you are willing to cook.
Step 3: Compare practical features
Check the control layout, basket or rack design, and cleaning requirements before buying. Look for parts you can remove and clean easily, and confirm whether the manual allows those parts in a dishwasher. Check replacement-part availability if a basket, tray, or seal could wear out.
Choose features you will use. Simple temperature and time controls can be enough for everyday cooking. Preset programs may save setup time, but they do not replace checking food for doneness. Consider noise, weight, cord length, and whether the appliance is easy to move if you will put it away after each use.
Tip: Confirm the full appliance dimensions and cleaning instructions for the exact model and version; similar model names can refer to different sizes.
Check: You can explain why the model suits your meals, available space, and cleanup routine, and its parts match your cleaning preferences.
Step 4: Position the air fryer
Place the appliance on a stable, level, heat-resistant surface near an outlet. Keep it away from the sink, cooktop, paper towels, and other items that could be affected by heat. Leave the ventilation space specified by the manual and route the cord where it will not snag, hang over an edge, or touch a hot surface.
If you will store the air fryer between uses, let it cool completely before moving it. Make sure your storage spot is dry and that the appliance and accessories can fit without forcing or stacking them in a way the manufacturer does not allow.
Tip: Do not operate the air fryer inside a cupboard or pantry, even with the door open, unless the manual specifically allows that setup.
Check: The air fryer sits level, has clear ventilation, and its cord and nearby items are away from heat and water.
Step 5: Wash and prepare removable parts
Read the manual before using the appliance for the first time. Wash the basket, tray, or racks as directed, then dry them fully. Wipe the appliance’s interior and exterior with a suitable cloth; do not immerse the main unit or let water enter its electrical parts.
Follow any first-use instructions in the manual, including whether to run the appliance empty and for how long. Keep the room ventilated if the manual notes that a brief odor can occur during initial use.
Tip: Avoid metal utensils and abrasive cleaners on coated surfaces unless the manufacturer says they are safe; they may damage the coating.
Check: Removable parts are clean and dry, and you have completed the first-use instructions specified for your model.
Step 6: Cook a small first batch
Choose a simple food and follow a recipe suited to an air fryer. Arrange the food in a single layer where possible, with space for air to move around it. Avoid filling the basket to the top; crowded food can cook unevenly. Set the temperature and time from the recipe or appliance manual, and start checking the food before the stated cooking time ends.
Shake or turn food when the recipe calls for it, using care around hot surfaces and escaping steam. Use a food thermometer when appropriate and follow safe cooking guidance for the food. Do not rely on browned surfaces alone to judge whether meat or other food is cooked through.
Tip: Different models and food sizes cook differently. Treat preset programs as starting points and adjust based on the food and the manual.
Check: The food is cooked to a safe doneness, with the texture you wanted, and you know whether its portions need more space or a different cooking time next time.
Step 7: Clean and store after cooling
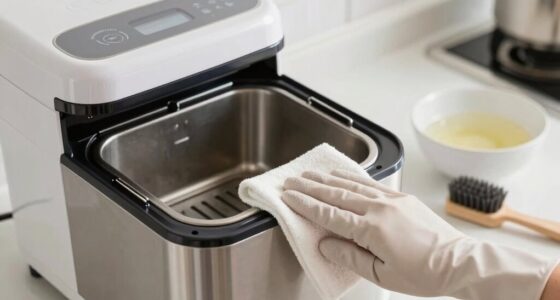
Switch off and unplug the appliance if the manual directs you to do so. Let it cool before removing the basket or cleaning. Wash removable parts using the method specified by the manufacturer, and wipe the interior and exterior without soaking the main unit. Remove grease and crumbs after use so they do not build up or smoke during later cooking.
Dry all parts fully before putting them away. If the air fryer stays on the counter, keep its ventilation area clear. If you store it, place the cord and accessories so they do not press against or scratch the appliance.
Tip: Do not pour water into a hot basket or use a wet cloth on a hot heating element. Follow the manual’s cooling and cleaning directions.
Check: The appliance is cool, clean, and dry, with no food debris left in the basket or cooking area.
Common Mistakes to Avoid
- Choosing a model by capacity alone — Compare its complete dimensions and required ventilation space with the counter or storage location before buying.
- Crowding the basket to cook a full meal in one batch — Arrange food with space for air circulation and cook in batches when needed for even results.
- Operating the appliance under a low cabinet or in a cupboard — Use a level, open counter location that meets the manual’s clearance requirements.
- Cleaning before the appliance has cooled or using an unapproved method — Wait until it cools and follow the manufacturer’s instructions for each removable part and surface.
Troubleshooting
Problem: The appliance does not fit on the planned counter
Solution: Recheck its full dimensions, including handle and basket movement, then move it to a larger open area or choose a more compact model. Do not reduce the ventilation clearance.
Problem: Food cooks unevenly
Solution: Use a smaller batch, spread pieces into a single layer, and shake or turn them if the recipe calls for it. Check the manual for rack placement and cooking guidance.
Problem: Food is browned outside but undercooked inside
Solution: Cut food into more even pieces, lower the temperature if the recipe supports it, and cook longer while checking doneness. Use a food thermometer for foods that need one.
Problem: Smoke appears during cooking
Solution: Stop the appliance if smoke is heavy or persistent. Let it cool, then check for grease or food residue and clean as directed. For fatty foods, follow the manual’s advice on managing drippings; do not add water unless the manufacturer instructs you to.
What Success Looks Like
Your air fryer fits its intended counter or storage location, has the clearance and outlet access required by the manual, and can be opened without hitting nearby surfaces. You can prepare a modest batch without overcrowding, judge doneness safely, and clean the appliance using the approved method. The finished food is cooked through and the appliance is cool, clean, and ready for its next use.
Next Steps
Keep the manual with the appliance or save a digital copy. Note the settings and batch size that worked for foods you cook often, then adjust one variable at a time when results differ. Clean the basket and cooking area after use, and check the cord, coating, and removable parts periodically for wear. Replace damaged parts only with compatible parts approved for your model.
Frequently Asked Questions
What size air fryer works for a small kitchen?
Choose based on both the number of portions you cook and the measured space available. A compact basket may suit one or two portions, while larger meals may take multiple batches. Compare the full dimensions and basket shape with your usual foods before choosing.
Can I put an air fryer under a kitchen cabinet?
Only if the manufacturer’s manual allows the location and the required clearance is available. Many models need open space around vents and above the appliance. Do not use it inside a closed cupboard.
Can an air fryer replace an oven?
It can handle many small portions and reheating tasks, but capacity and cooking modes vary by model. Check the manual for cookware compatibility and temperature limits; keep an oven for foods or quantities that do not fit the air fryer.
Do I need to preheat an air fryer?
Follow the recipe and your model’s manual. Some foods benefit from preheating, while some appliances do not require it. Account for preheating when a recipe specifies it, and avoid running the appliance empty unless the manual permits it.
How do I keep food from sticking?
Use the amount of oil recommended by the recipe, avoid forcing food loose from a hot coated basket, and clean residue after the appliance cools. Check the manual before using cooking spray, liners, or accessories because some products can damage the coating or block airflow.
NFL season / tailgating Picks
team gear
As an affiliate, we earn on qualifying purchases.