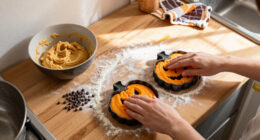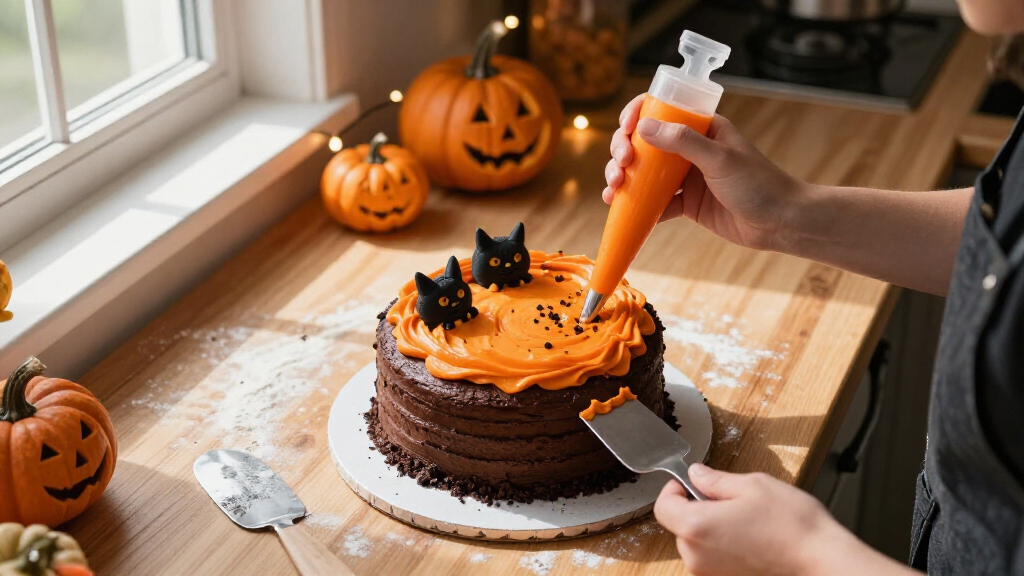
Use a Halloween-themed cake decorating kit to turn a cooled, plain cake into a finished centerpiece with themed colors, toppers, and edible details. This guide is for beginner home bakers who have a kit and want to know how to prepare the cake, place decorations, and check the result before serving. Set aside about 1-2 hours for decorating; baking and cooling the cake take additional time.

Get kitchen staples and gadgets delivered free — and shop member deals
- Fast, free delivery on millions of items
- Access to Prime Big Deal Days deals on October 6–7
- Prime Video, Amazon Music and more included

Sweets Indeed Halloween Frosting Decorating Kit with Sprinkles
- ✔ Frosting tubes: 3
- ✔ Tube size: 3 oz each
- ✔ Frosting colors: Orange, black, and white

Halloween Cookie Decorating Kit with Frosting, Tips, Cutters, and Sprinkles
- ✔ Brand: Twinkle Bites
- ✔ Frosting tubes: 3
- ✔ Frosting colors: Orange, black, and white
Difficulty: Beginner | Time: 1-2 hours, plus cooling time
What You’ll Need
Tools & Materials:
- Halloween cake decorating kit with its packaging or instructions
- Cooled cake, baked in a size and shape suited to the decorations
- Frosting or icing in a flavor that suits the cake
- Offset spatula or butter knife
- Small bowls and spoons
- Scissors, if the kit includes packaging that needs opening
Knowledge:
- Basic ability to spread frosting
- Ability to identify whether kit decorations are edible or for display only
Read the kit label before opening it. Check the listed cake size, serving guidance, storage directions, and whether pieces such as picks, candles, plastic figures, or wrappers are edible. Keep non-edible pieces away from children who may mistake them for food.
Sweets Indeed Halloween Frosting Decorating Kit with Sprinkles
For a mixed batch of cakes, cupcakes, and cookies, Sweets Indeed offers the more complete decorating setup without making cookie shaping the focus. Its three 3-ounce tubes provide orange, black, and white frosting, while four nozzle attachments give decorators a choice of piping effects. The 2-ounce sprinkle mix with candy eyeballs adds a distinct Halloween finish that is especially easy for children or guests to apply. Compared with Twinkle Bites, this kit tells us more about the amount of frosting and sprinkles, helping buyers plan for a party or classroom activity. The tradeoff is that it lacks the themed cookie cutters included by Twinkle Bites, so it will not shape dough for you. Its colors and decorations are also seasonal, and the description’s mess-free claim should be read as an intended convenience rather than a guarantee of tidy baking. Choose it when variety across several baked treats matters more than cutters.
Pros:
- Three 3-ounce frosting tubes in orange, black, and white
- Four nozzle attachments support different piping effects
- 2-ounce sprinkle mix includes candy eyeballs
- Designed for decorating cakes, cupcakes, cookies, and other treats
Cons:
- Seasonal colors and decorations have limited use beyond Halloween
- No cookie cutters are included
- Mess-free handling is described but cannot be assured in practice
Best for: Families or party hosts decorating a mix of cakes, cupcakes, and cookies who want frosting, piping tips, and themed sprinkles together.
Not ideal for: Bakers who specifically want Halloween cookie cutters, or anyone seeking a neutral kit for regular, year-round decorating.
Bottom line: Our best overall choice for mixed Halloween treat decorating, with clearer quantity details and candy eyeball sprinkles outweighing the absence of cookie cutters.
“Our best overall choice for mixed Halloween treat decorating, with clearer quantity details and candy eyeball sprinkles outweighing the absence of cookie cutters.”
Halloween Cookie Decorating Kit with Frosting, Tips, Cutters, and Sprinkles
Twinkle Bites is the more purposeful pick for shaped cookies: its pumpkin, bat, and ghost cutters add a step the Sweets Indeed kit cannot cover. It also includes three tubes of orange, black, and white frosting, four icing tips, and a bag of sprinkles, so the basic decorating components overlap with our top pick. Those cutters can help a family build a coordinated Halloween assortment before piping and decorating, while the kit is also described for cakes, cupcakes, and brownies. The main compromise is less detail about the quantities: the listing gives a 3.5-ounce unit count alongside a 10-gram item weight, figures that do not clearly explain the total usable contents. It names the sprinkles but does not specify their weight or whether they include candy shapes. Compared with Sweets Indeed, Twinkle Bites offers more shaping tools but less confidence about the amount of decorating material. It suits cookie-led baking best.
Pros:
- Includes pumpkin, bat, and ghost cookie cutters
- Three Halloween frosting colors and four icing tips are included
- Sprinkles accompany the frosting and cutters
- The described uses include cakes, cupcakes, brownies, and cookies
Cons:
- Listed unit count and item weight do not clearly communicate total contents
- Sprinkle quantity and specific designs are not described
- Its cutter advantage matters less to buyers focused mainly on decorating cakes
Best for: Bakers planning pumpkin, bat, and ghost cookies who also want frosting and tips for finishing the shapes.
Not ideal for: Shoppers who need clear quantity information or want a specifically described candy eyeball sprinkle mix for cake and cupcake designs.
Bottom line: Pick Twinkle Bites when themed cookie cutters are the deciding feature and you can accept less precise quantity information.
“Pick Twinkle Bites when themed cookie cutters are the deciding feature and you can accept less precise quantity information.”
As an Amazon Associate we earn from qualifying purchases.
Before You Start
Let the cake cool completely before frosting. Warm cake can soften the icing and cause decorations to slide. Clear a flat work surface, wash your hands, and set out a serving plate or cake board large enough for the cake. If the kit contains pieces that need assembly, inspect their instructions before you start decorating so you do not have to handle the frosted cake while searching for directions.
Keep food decorations in their packaging until you are ready to place them. If the kit includes allergens, check the ingredient label before serving the cake. Keep decorations that are not food-safe separate from edible pieces.
Step-by-Step Instructions
Step 1: Check the kit and plan the design
Open the kit and lay out its contents on a clean, dry surface. Read the package for assembly directions, size limits, storage guidance, and any warnings. Sort the pieces into edible decorations, non-edible toppers, and items that need assembly. Choose a simple layout: for example, place one large topper in the center and arrange smaller candies or shapes around it. Leave space for candles or a message if you plan to add them.
Tip:Do not assume a pick, figure, or printed decoration is edible. Follow the package label and keep display-only pieces in their wrappers until placement.
Check: You can name which pieces touch the cake, which are edible, and where each decoration will go.
Step 2: Prepare the cake and serving surface
Place the fully cooled cake on a sturdy board or serving plate. If the top is domed, trim only enough cake to make the surface stable, using a serrated knife and keeping fingers clear of the blade. Brush away loose crumbs. If you are stacking layers, add a thin layer of frosting between them and check that the stack sits level before covering the outside.
Tip:Move the cake to its final board before frosting if possible. Lifting a fully decorated cake can shift the icing and toppers.
Check: The cake rests flat without rocking, and the top is ready for an even coat of frosting.
Step 3: Apply a crumb coat
Spread a thin layer of frosting over the top and sides with an offset spatula or butter knife. Work gently to trap loose crumbs in this first layer rather than dragging them through the icing. Refrigerate the cake for about 15-20 minutes, or until the frosting feels firm to a light touch.
Tip:Use a small amount of frosting for the crumb coat. A thick first layer can pull crumbs into the finished surface.
Check: The crumb coat looks thin and set, with most loose crumbs held in place.
Step 4: Add the final frosting layer
Spread the remaining frosting over the cake, covering the top and sides in an even layer. Smooth it with long, light strokes. Add colored frosting or a simple border if you want to coordinate with the kit. Keep the top reasonably level so flat decorations, lettering, or a centerpiece can sit securely.
Tip:If the frosting becomes too soft to smooth, chill the cake briefly before continuing. Avoid pressing hard, which can tear the crumb coat.
Check: The cake is covered evenly and the frosting is firm enough to hold the decorations.
Step 5: Place the main topper
Set the largest topper or centerpiece in its planned position, usually near the center or toward the back of the cake. For a pick or figurine, insert it gently and keep any stick or base as visible as the package directs. For a flat edible piece, place it on the frosting without bending it, then press very lightly so it adheres.
Tip:Do not force a rigid pick into a dense cake. Make a small opening with a clean skewer first if the package allows, then insert the pick straight.
Check: The centerpiece stands or lies in place without leaning, sinking, or cracking.
Step 6: Arrange the smaller decorations
Place the smaller candies, shapes, or edible images around the main topper. Work from large pieces to small ones, spacing colors and shapes so the design looks balanced from the front and above. Press edible decorations just enough to attach them to the frosting. Keep non-edible picks and figures on the surface only as directed by the kit.
Tip:Leave a clear path to cut the cake. Avoid covering the entire top with hard candies if guests will need to slice through them.
Check: The decorations are distributed across the cake, remain attached, and do not crowd the cutting area.
Step 7: Add lettering or finishing details
If the kit includes lettering or you are piping a short message, add it after the larger pieces are secure. Keep the message brief and use a steady hand; test the piping pressure on a plate first if you are using a piping bag. Add sprinkles or small details last, placing them where they will not hide important parts of the design.
Tip:Do not pipe over damp edible images or delicate decorations. Moisture can blur printed colors or make thin pieces wrinkle.
Check: The message is readable, and finishing details support the design without obscuring it.
Step 8: Inspect and store the finished cake
Check that each topper is stable and that no packaging, loose wrapper, or tool remains on the cake. Remove or clearly identify any non-edible pieces before serving. Follow the kit and frosting storage directions; refrigerate when the ingredients require it, and protect the cake from contact with a lid or wrap that could press into decorations.
Tip:If using candles, add them shortly before serving and supervise them while lit. Remove them before cutting.
Check: The cake can be carried or displayed without pieces falling, and everyone serving it can identify which decorations must be removed.
Common Mistakes to Avoid
- Frosting a cake while it is still warm. — Wait until the cake is fully cool to the touch. Chill it briefly if the center still feels warm after the outside has cooled.
- Putting non-edible decorations where guests may eat them. — Read the kit label, keep display-only items distinct, and tell guests to remove picks or figures before serving.
- Overloading the cake with decorations. — Plan the main topper first and leave room around it for smaller pieces, serving candles, and clean slices.
- Adding fragile decorations before the frosting is ready. — Let the final frosting layer firm slightly, then place delicate pieces with light pressure.
Troubleshooting
Problem: The frosting pulls up crumbs while you spread it.
Solution: Stop smoothing, patch the thin areas with frosting, and chill the cake until the crumb coat firms. Apply the final coat with lighter strokes.
Problem: A topper leans or sinks into the cake.
Solution: Remove it gently, check that the cake and frosting are stable, and reinsert it in a fresh spot. For a pick, make a small opening first rather than pushing harder.
Problem: Edible decorations slide across the frosting.
Solution: Chill the frosted cake briefly so the surface firms, then reposition the pieces with minimal pressure. Avoid placing decorations on a wet or very soft icing layer.
Problem: The cake board flexes when you move the cake.
Solution: Slide a rigid tray or baking sheet under the board before lifting, or transfer the cake to a sturdier board before decorating.
What Success Looks Like
The finished cake has an even frosting layer, a stable main topper, and smaller decorations arranged so the Halloween theme is easy to recognize. No wrappers or tools remain on the cake, and non-edible pieces are easy to identify and remove. The cake stays intact when moved and can be cut and served safely.
Next Steps
Store leftovers according to the cake, frosting, and kit package directions. Remove display-only decorations before wrapping or refrigerating if they could press into the cake. Before serving, check once more for picks, candles, or other pieces that guests must remove. Keep leftover kit pieces sealed, dry, and labeled for a future cake only if the package allows reuse.
Frequently Asked Questions
Can I decorate the cake the day before Halloween?
Usually, yes, if the cake and frosting can be stored safely overnight. Follow the ingredient and kit storage directions, and add delicate or moisture-sensitive decorations closer to serving time if they may soften.
Do I need to use the frosting included in the kit?
Use the included frosting if the kit requires it for its decorations. Otherwise, a compatible frosting of your choice can work; check the package for any specific surface or setting instructions.
How do I tell whether a cake topper is edible?
Check the packaging for an edible label and ingredient information. If the label identifies the item as a pick, plastic figure, or display decoration, treat it as non-edible and remove it before serving.
What should I do if my cake is smaller than the kit recommends?
Use fewer decorations and choose a smaller centerpiece if the kit offers one. Do not force every piece onto a small cake; keep unused pieces sealed and follow the package directions for storage.
NFL season / tailgating Picks
team gear
As an affiliate, we earn on qualifying purchases.