If your KitchenAid Artisan Series 5 Quart Tilt Head Stand Mixer is making a grinding noise, it can be concerning and disruptive. This guide provides clear, practical steps to identify the causes and fix common issues safely, ensuring your mixer runs smoothly again.
Following these instructions will help you resolve the problem efficiently, whether it’s a minor issue or something requiring a bit more attention.
Key Takeaways
| Identify the noise | Grinding sounds often indicate a mechanical issue or debris inside the mixer. |
| Inspect the attachments | Worn or misaligned attachments can cause noise and should be checked. |
| Check for obstructions | Debris or ingredients jammed inside can lead to grinding sounds. |
| Perform routine maintenance | Lubricate or clean parts to prevent future noise issues. |
| Ensure proper assembly | Incorrectly assembled mixer parts can cause abnormal noises. |

KitchenAid Artisan Series 5 Quart Tilt Head Stand Mixer with Pouring Shield KSM150PS, Milkshake
Built to take it all on with the durable and built-to-last metal construction, and 59 touchpoints around the...
As an affiliate, we earn on qualifying purchases.
Step 1: Turn Off and Unplug the Mixer
Always disconnect the mixer from power before inspecting or working on it. This ensures safety and prevents accidental operation.
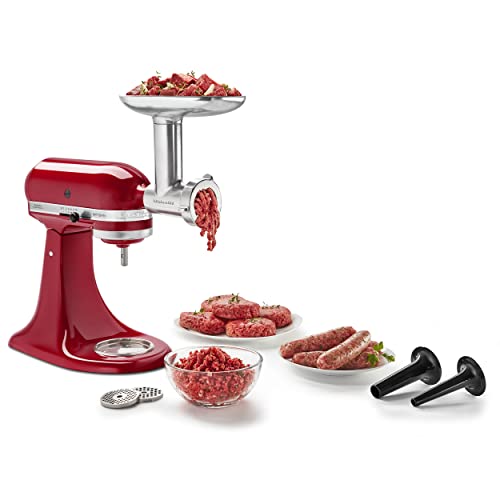
KitchenAid Stand Mixer Attachment, Food Grinder KSMMGA, Metal Food Grinder
Connect to any household KitchenAid Stand Mixer power hub and use the power of the motor to run...
As an affiliate, we earn on qualifying purchases.
Step 2: Remove Attachments and Check for Debris
- Release the tilt-head and remove any attachments like the flat beater or dough hook.
- Inspect the attachment area and the bowl for any stuck ingredients or debris.
- Clean out any obstructions carefully with a soft cloth or brush.
Step 3: Examine the Attachments and Components
- Check for worn or damaged attachments. Replace if necessary.
- Ensure attachments are securely fitted onto the hub.
- Inspect the beater shaft and the gear mechanisms for signs of wear or damage.
Step 4: Lubricate Moving Parts
If the mixer has been used extensively, applying a small amount of food-grade lubricant on the gear and moving parts can reduce grinding noise. Consult your user manual for specific lubrication points.
Step 5: Reassemble and Test
- Reattach the attachments securely.
- Plug in the mixer and run it at a low speed to check for noise.
- If the noise persists, proceed with further inspection or professional servicing.
The Products in This Guide
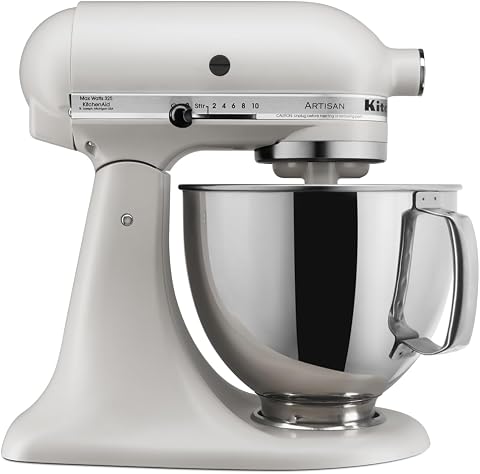
KitchenAid Artisan Series 5 Quart Tilt Head Stand Mixer
- ✔ Bowl Type: Stainless Steel
- ✔ Power: 325W
- ✔ Dimensions: 14 x 8 x 14 inches

KitchenAid Stand Mixer Attachment
- ✔ Pre-chill: Required
- ✔ Processing: Meat, vegetables
- ✔ Storage: Included case
KitchenAid Artisan Series 5 Quart Tilt Head Stand Mixer
The KitchenAid Artisan Series 5 Quart Tilt Head Stand Mixer is built for durability and versatile use. Grinding noises are often due to minor issues like debris or attachment misalignment, which are easy to address following this guide.
Pros:
- Durable metal construction
- Multiple speeds for versatile tasks
- Large 5-quart stainless steel bowl
- Tilt-head design for easy access
Cons:
- Noise may indicate mechanical wear over time
- Requires regular maintenance
- Attachments sold separately
Best for: Home bakers and cooking enthusiasts needing a reliable, versatile mixer.
Not ideal for: Heavy-duty industrial use or frequent professional bakery environments.
Bottom line: A dependable stand mixer that can be maintained easily to prevent grinding noises.
KitchenAid Stand Mixer Attachment
This metal food grinder attachment connects seamlessly to your KitchenAid stand mixer, enabling you to grind fresh meat, vegetables, and more. It’s a great addition if you’re seeking more functionality and want to avoid issues like grinding noise caused by debris or improper attachment.
Pros:
- Multiple grinding plates included
- Sturdy metal build
- Easy to attach and clean
- Sausage stuffer tubes included
Cons:
- Requires refrigerator/freezer pre-chilling
- Additional cost
- Needs careful cleaning after use
Best for: Home cooks wanting fresh ground ingredients and attachments for variety.
Not ideal for: For those who rarely grind ingredients or prefer pre-packaged options.
Bottom line: A durable attachment that expands your KitchenAid’s capabilities for fresh grinding.
Frequently Asked Questions
Why is my KitchenAid mixer making a grinding noise?
Grinding noises often result from debris stuck in the attachment area, worn or misaligned attachments, or mechanical wear inside the mixer. Regular inspection and maintenance can resolve most issues.
How do I fix a grinding noise in my KitchenAid mixer?
Start by unplugging the mixer, removing attachments, and cleaning out any debris. Check for worn parts or misalignment, lubricate moving parts if needed, and reassemble carefully. If noise persists, consider professional servicing.
Can I lubricate my KitchenAid stand mixer?
Yes, using food-grade lubricant on the gear and moving parts can reduce noise. Refer to your user manual for specific points to lubricate and avoid over-application.
When should I replace attachments or parts?
Replace attachments if they show signs of excessive wear, damage, or misalignment. Regular inspection helps maintain optimal performance and prevents noise issues.
Keep Your KitchenAid Running Smoothly
Addressing grinding noises in your KitchenAid stand mixer is straightforward with routine checks and proper maintenance. Always ensure attachments are clean, properly fitted, and in good condition to keep your mixer operating quietly and efficiently. Regular care extends the lifespan of your appliance and ensures your baking and cooking projects go smoothly.
Affiliate disclosure: As an Amazon Associate we earn from qualifying purchases. Prices and availability are accurate as of the time of publishing.