
If your blender isn’t blending smoothly, your blades might be dull. Signs include uneven textures, chunks left unblended, longer blending times, or a burning smell during use. visually, dull blades look chipped, rounded, or worn, and microscopic inspection reveals scratches or corrosion. Dull blades can turn your smoothies gritty and affect the overall texture. To avoid this frustration, learn how to spot, test, and maintain sharp blades—then discover how to keep them effective.
Key Takeaways
- Dull blades often have rounded, chipped, or uneven edges visible upon inspection.
- They cause food to remain chunky or unevenly blended, resulting in coarse textures.
- Signs include longer blending times, gritty results, and a burning smell during operation.
- Visual wear manifests as corrosion, scratches, or surface pitting on the blades.
- Dull blades reduce blending efficiency, leading to poor textures and increased motor strain.

for Oster Blender Replacement Parts Blender Ice Blade with Jar Base Cap and Two Rubber O Ring Seal Gasket Accessory Refresh Kit
- Package Includes: Blade, jar base, seals, and gasket
- Compatibility: Fits Oster blenders with 2 3/4" base
- Replacement Kit: Suitable for most Oster blender jars
As an affiliate, we earn on qualifying purchases.
As an affiliate, we earn on qualifying purchases.
How to Spot Dull Blender Blades: Signs to Look For
Are your blender’s blades still sharp enough to handle tough ingredients? If you’re struggling to blend smoothies smoothly or your soups aren’t achieving the desired texture, it might be time to check. Dull blades often show uneven blade alignment, causing inefficient blending. Examine the blade material—over time, metal blades can become chipped or bent, which impacts performance. Bent or misaligned blades won’t spin correctly, leading to poor blending results. Look for signs like food chunks remaining unblended, longer blending times, or a burning smell during operation. If you notice any of these, it’s a clear indicator that your blades are dull or damaged. Regularly inspecting blade alignment and material condition helps prevent further wear and keeps your blender functioning at its best. Additionally, understanding blade technology can help you choose the right replacement or upgrade for optimal performance. Maintaining your blades with proper blending techniques can also extend their lifespan and improve your blending results. Incorporating sustainable maintenance practices not only prolongs blade life but also supports environmentally friendly kitchen habits.

Corona Tools Handheld Garden Tool Sharpener– Blade Sharpener for Pruning Shears, Loppers, Hedge Clippers & More
- Blade Material: Tungsten Carbide for Fast Sharpening
- Compatible Tools: Pruning shears, loppers, hedge clippers, and more
- Design & Portability: Compact, lightweight, and portable
As an affiliate, we earn on qualifying purchases.
As an affiliate, we earn on qualifying purchases.
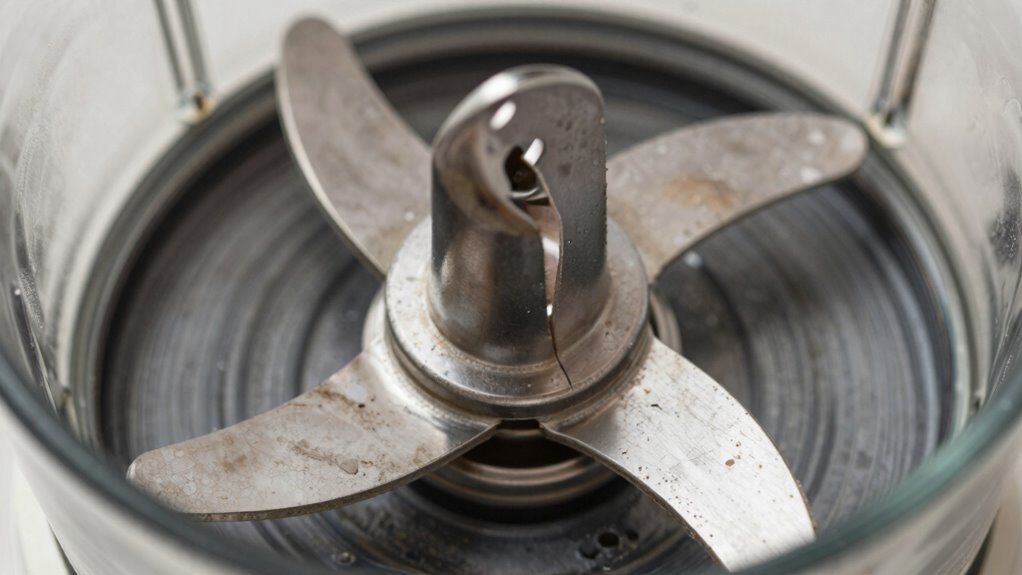
What Do Blender Blades Look Like Under the Microscope?
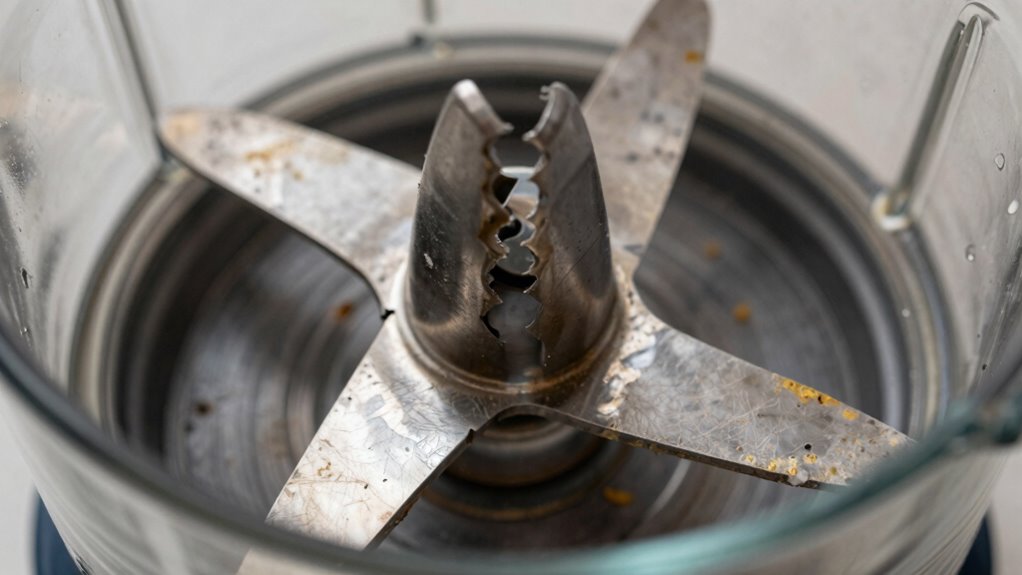
When you look at blender blades under the microscope, you’ll notice the condition of the edges and surface texture. Dull blades often show chips, rounded edges, or uneven surfaces compared to sharp ones. These microscopic changes can tell you a lot about the blade’s wear and when it’s time to replace it.
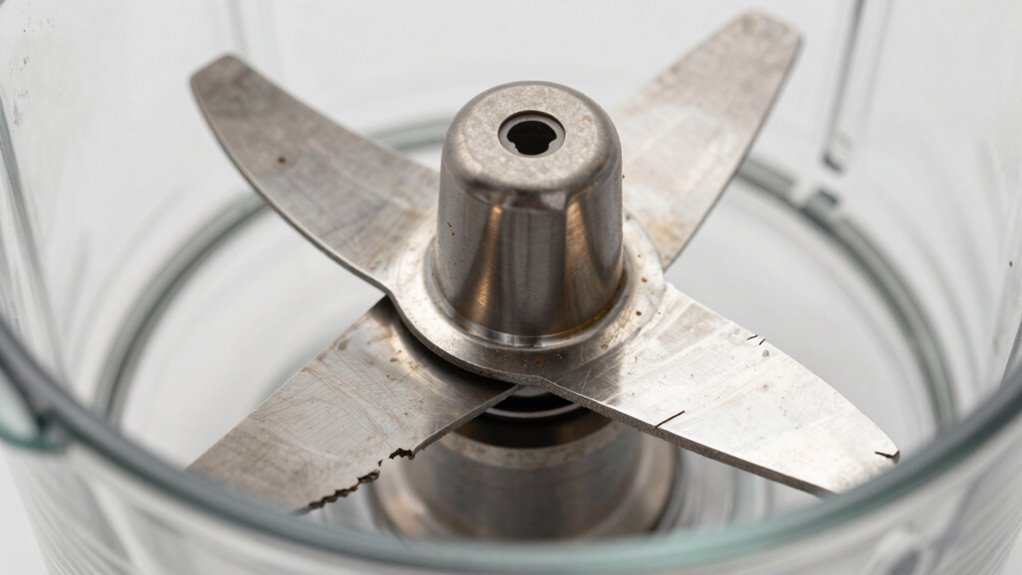
Blade Edge Condition
Ever wondered what your blender blades look like up close? The blade edge reveals a lot about its sharpness maintenance. When blades are new, their edges are crisp and finely honed, cutting through ingredients effortlessly. Over time, the edge becomes rounded, dull, or chipped, impairing performance. You might notice:
- Reduced ability to finely blend or puree
- Increased strain on your motor
- Uneven textures in your recipes
A dull blade compromises the sharpness maintenance, making blending more difficult. Under the microscope, dull blades have rounded or chipped edges, losing their initial precision. Keeping the blade edge sharp involves regular inspection and timely sharpening, ensuring efficient blending and better texture results. Sharp blades not only perform better but also last longer, saving you money and frustration.
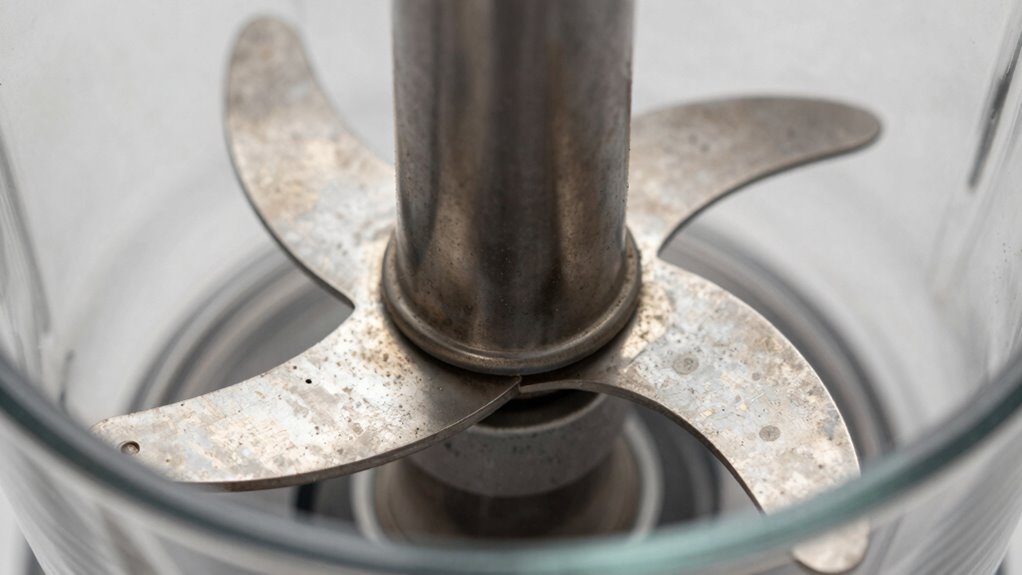
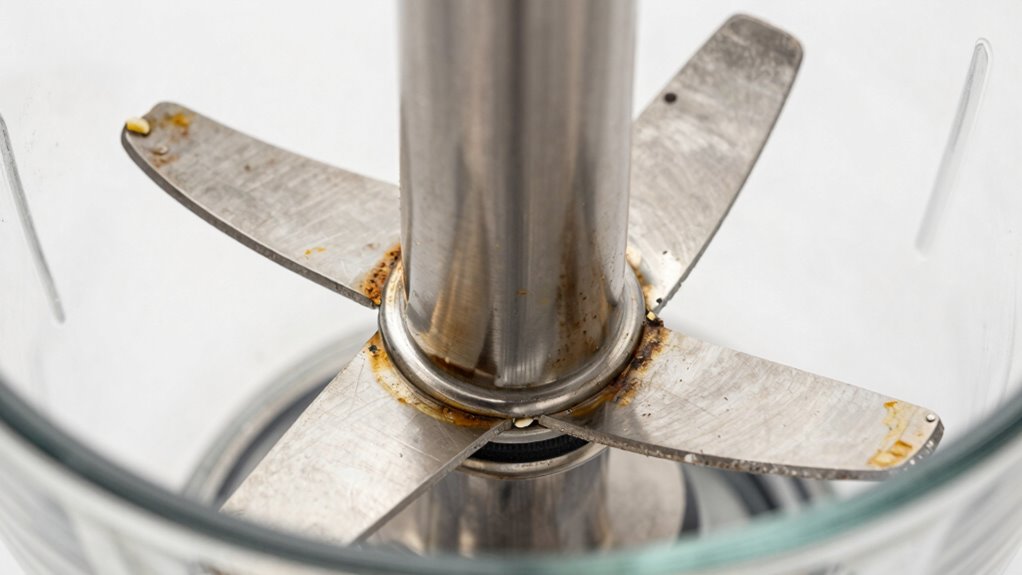
Surface Texture Changes
Under a microscope, the surface texture of blender blades reveals important wear and damage that isn’t visible to the naked eye. You’ll notice scratches, pitting, and rough patches caused by prolonged use. The blade material plays a vital role in how quickly these changes occur—softer metals tend to corrode and show surface corrosion sooner. Surface corrosion appears as dark spots or flaky residue, weakening the blade’s integrity. These microscopic imperfections disrupt the smooth, sharp surface needed for efficient blending. As corrosion progresses, the blade’s surface becomes uneven, increasing friction and reducing cutting power. This deterioration affects your blending quality, making textures less uniform and more inconsistent. Regular inspection under a microscope can help you identify early signs of damage before performance markedly declines. Additionally, understanding sound vibrations and their influence on cellular regeneration can provide insights into how blade material can be optimized for durability. Recognizing these subtle surface changes is crucial for maintaining optimal blade performance and ensuring safe, effective blending. Staying aware of wear patterns can also guide you in timely blade replacement to preserve blending quality.

for Oster Blender Replacement Parts Blender Ice Crusher Blade with Jar Base Cap Coupling Stud Slinger Pin and 2 Rubber O Ring Sealing Ring Gasket
- Package Includes: Blade, jar base, coupling, seals
- Compatibility: Fits Oster blenders with 2 3/4" base
- Replacement Kit: Ideal for smoothies and blender foods
As an affiliate, we earn on qualifying purchases.
As an affiliate, we earn on qualifying purchases.
How Dull Blades Wreck Your Blending Results and What to Do
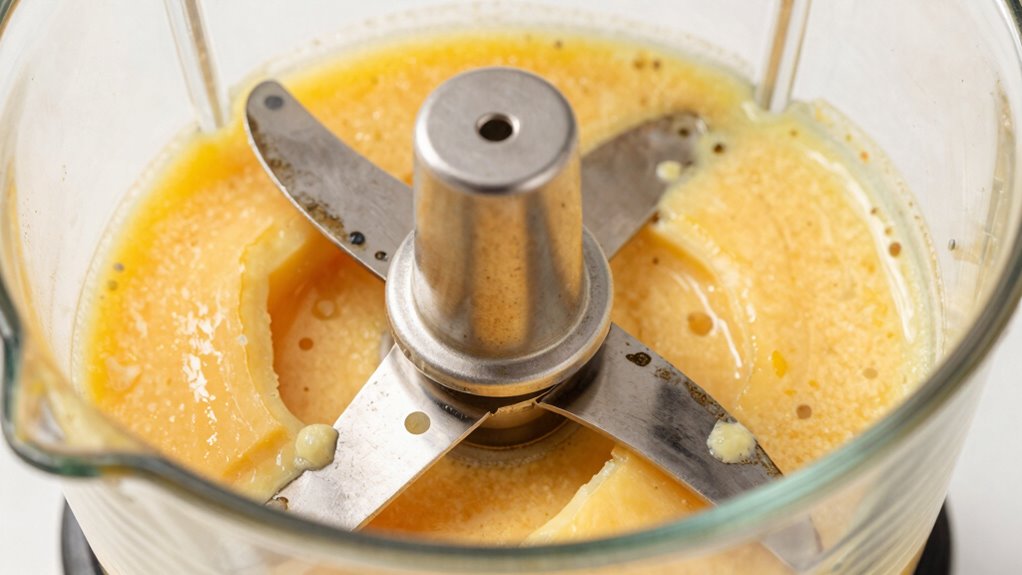
Dull blades can considerably compromise your blending results, leaving ingredients unevenly processed and textures inconsistent. Over time, blade material wears down, reducing cutting efficiency, especially if you blend frequently. This deterioration causes chunks or unblended pockets, frustrating your efforts. To avoid this, pay attention to these signs:
- *Longer blending times that strain your motor*
- *Unwanted texture variations in your recipes*
- *Frequent need for scraping down ingredients*
Regularly assess your blades and consider sharpening or replacing them if dullness persists. Proper maintenance extends blade life and ensures consistent results. Adjust your blending frequency to prevent unnecessary wear—overuse accelerates dulling. Staying proactive keeps your blender performing at its best, saving you time, effort, and the quality of your creations.
for Oster Blender Replacement Parts Blender Ice Blade with Jar Base Cap and Two Rubber O Ring Seal Gasket Accessory Refresh Kit
- Package Includes: Blade, jar base, seals, and gasket
- Compatibility: Fits Oster blenders with 2 3/4" base
- Replacement Kit: Suitable for most Oster blender jars
As an affiliate, we earn on qualifying purchases.
As an affiliate, we earn on qualifying purchases.
How Can You Test if Your Blender Blades Are Dull at Home?
Start by inspecting your blades closely for any nicks or visible damage. Then, try a simple test blend with harder ingredients like ice or nuts to see if your blender handles them smoothly. If it struggles or leaves chunks, your blades might be dull enough to need sharpening or replacement. Additionally, blade sharpness plays a crucial role in ensuring your blender performs efficiently and produces the desired texture.
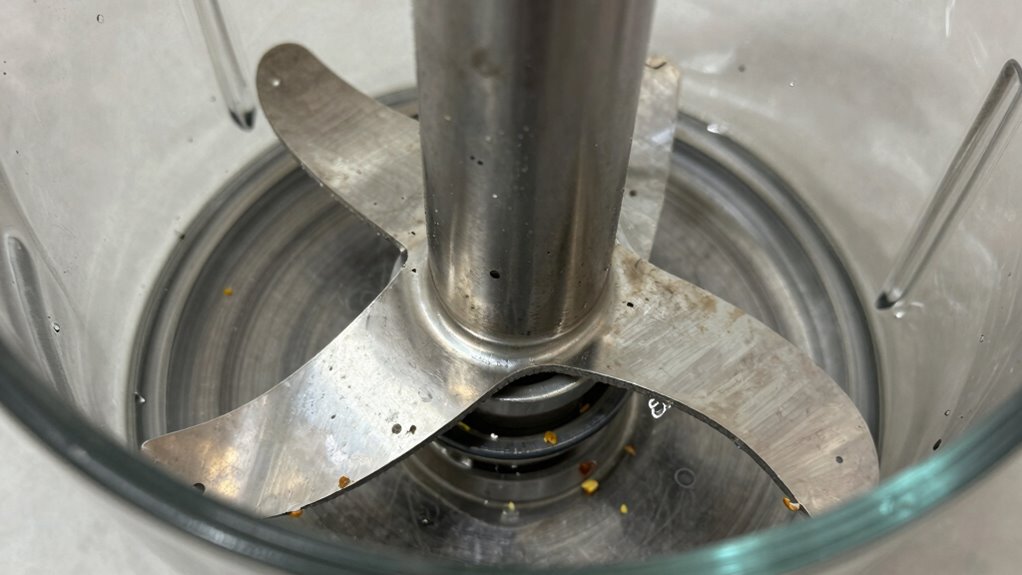
Examine Blades for Nicks
Check for:
- Jagged or rough edges that catch your eye
- Bumps or dents along the blade surface
- Uneven blade alignment, hinting at potential damage
If you notice any of these signs, your blades aren’t just dull—they’re damaged. Damaged blades struggle to produce smooth textures, and continued use can worsen the problem. Regularly examining your blades helps catch issues early, ensuring your blender performs at its best.
Conduct a Test Blend
To determine if your blender blades are dull, perform a simple test blend with ingredients that require cutting power, such as frozen fruit or thick smoothies. If it struggles or takes longer, your blades may be dull or misaligned. Check your blender motor’s performance during the test; if it sounds strained or runs unusually hot, blades might be dull or improperly aligned. Additionally, dull blades can reduce the overall efficiency of your blender, similar to how electric dirt bikes lose power when their components wear out.
Should You Sharpen or Replace Your Blender Blades?

When your blender blades become dull, deciding whether to sharpen or replace them depends on several factors. If you’re committed to blade maintenance and want to restore sharpness, sharpening might be a good choice. However, if the blades are severely damaged or corroded, replacement is often the safer, more effective option. Consider these points:
- The cost and time involved in sharpening versus replacing
- The extent of dullness or damage to the blades
- How much you value ideal performance and safety
- Precious metal investments have shown that sometimes, investing in new blades can be more cost-effective and safer in the long run, especially when durability and performance are critical.
Sharpening can bring your blades back to life, but it’s not always sustainable. Sometimes, a new set offers better sharpness restoration and peace of mind, especially with tough, stubborn ingredients. Your decision hinges on safety, efficiency, and budget.
Tips to Keep Your Blender Blades Sharp and Effective
Keeping your blender blades sharp and effective doesn’t have to be complicated—regular maintenance can make a big difference. Start by choosing blades made from durable blade material, like stainless steel, which resists dulling and corrosion. Pay attention to blade design; blades with sharp, well-angled edges cut through ingredients more efficiently and stay sharper longer. Avoid blending hard items like frozen bones or excessively tough produce, which can dull blades quickly. Clean blades immediately after use to prevent residue buildup that can affect performance. Use a gentle brush or sponge and avoid harsh abrasives that could scratch the blade material. Regularly inspect your blades for signs of dullness or damage, and replace or sharpen them as needed to maintain peak performance.
Common Mistakes That Dull Blender Blades Faster
Using your blender improperly can quickly dull the blades and reduce their lifespan. Common mistakes like using the wrong blade material or ignoring blade design can accelerate dulling. For example, blending hard ingredients like ice or nuts without proper blade strength strains the material, causing chips or dullness. Failing to clean blades regularly allows residue buildup that hampers cutting efficiency. Additionally, using dull or incompatible blades for specific tasks forces them to work harder, wearing them out faster.
- You risk damaging the blade material with harsh ingredients
- Poor blade design makes dulling inevitable over time
- Neglecting proper cleaning accelerates wear and tear
Being mindful of these mistakes helps preserve your blades longer, maintaining sharpness and performance.
Frequently Asked Questions
How Often Should I Replace My Blender Blades?
You should replace your blender blades every 6 to 12 months, depending on usage and blade maintenance. Regularly inspecting blades for dullness or damage helps you determine when it’s time for a replacement. Dull blades strain the motor and compromise texture, so don’t wait too long. Following a consistent replacement schedule guarantees peak performance and prevents unnecessary wear on your blender.
Can Dull Blades Cause Motor Strain or Damage?
Yes, dull blades can cause motor strain and damage. When blades are dull, they require more effort to blend, forcing the motor to work harder. This increased load can lead to overheating, wear, or even motor failure over time. Additionally, dull blades can cause uneven blending, adding stress to the blade assembly and increasing the risk of blade damage. To prevent this, replace blades when they become dull.
Are There Specific Foods That Dull Blades Faster?
Think of your blender blades as a race car engine—some foods push them harder than others. Foods with high acidity, like citrus or tomatoes, can corrode blades faster, acting like a harsh road that wears down tires. Ice crushing also dulls blades quickly, as the constant impact acts like rough terrain. To prolong blade life, blend softer ingredients first and limit aggressive ice blending.
What Tools Are Best for Sharpening Blender Blades?
You should use abrasive tools like a sharpening stone or fine-grit sandpaper for blade sharpening techniques. The best DIY methods involve carefully running the blades across the abrasive surface at the correct angle, ensuring even sharpening. You can also use a specialized blade sharpener or a metal file for minor dullness. Always clean the blades thoroughly after sharpening to maintain their efficiency and avoid contamination.
How Long Does a Typical Blade Sharpening Process Take?
The sharpening process usually takes about 10 to 20 minutes, depending on how dull your blades are. During blade maintenance, you’ll use specific sharpening techniques, like grinding or honing, to restore the edge. Make sure to follow proper steps and use the right tools to avoid damaging the blade. With patience and care, you can quickly bring your blender blades back to sharpness, ensuring ideal performance.
Conclusion
A dull blender blade might seem harmless, but it can ruin your textures just like a blunt knife spoils a perfect cut. While sharpening keeps your blades slicing smoothly, ignoring the signs can turn your smoothies into chunky battles. Think of your blades as the unsung heroes of your kitchen—keeping them sharp guarantees effortless blending, turning frustrating moments into simple, satisfying creations. Don’t let dull blades dull your culinary experience; stay sharp and blend with confidence.